 Fixated on Home
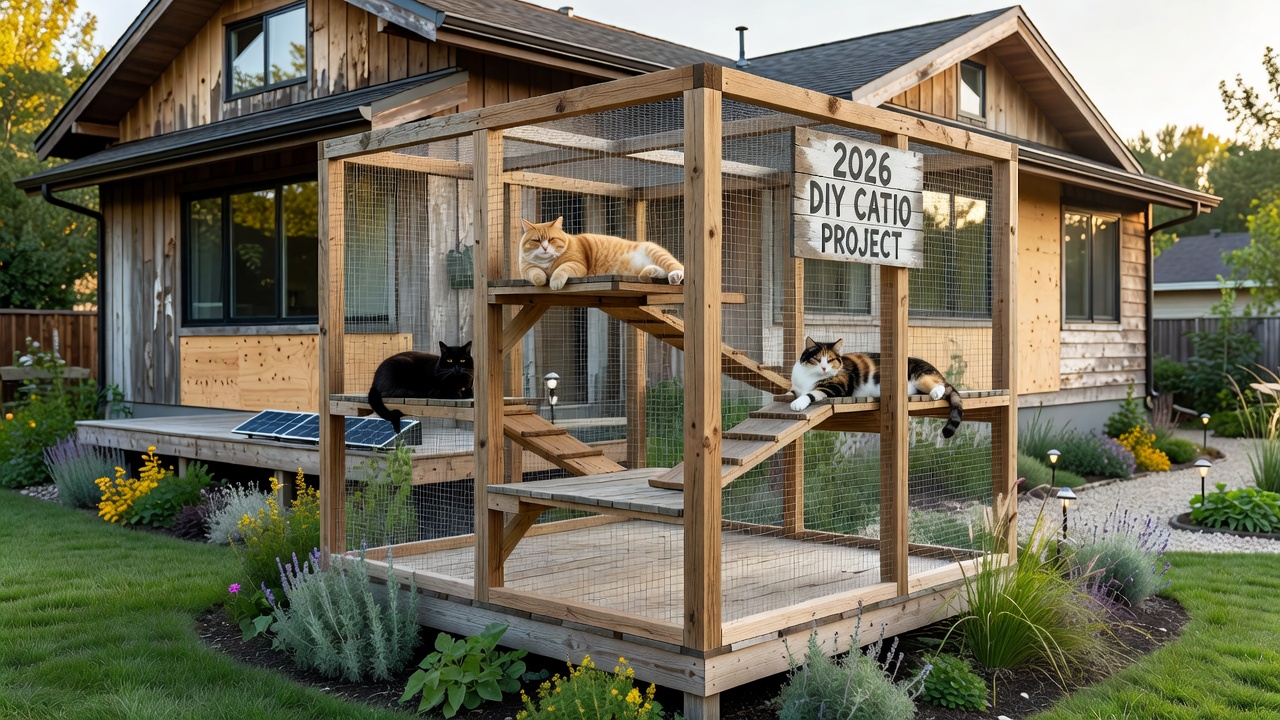
Introduction to DIY Catio Builds for Fixer-Upper Yards
Homeowners in 2026 are increasingly turning to DIY projects that blend pet safety with outdoor upgrades. A catio provides a secure outdoor space for cats, protecting them from traffic, predators, and escape while allowing fresh air and stimulation. This guide focuses on integrating enclosures with existing suburban structures like decks or fences in fixer-upper properties. Whether you have one cat or need zoning for multiple pets, careful planning ensures durability against weather. We cover beginner-friendly steps, material comparisons, and real-world suburban examples from across the country.
Many suburban fixer-uppers from the mid-20th century feature yards that need modern pet-friendly renovations. Adding a catio not only improves your home's functionality but also enhances the daily lives of indoor cats that might otherwise lack stimulation. By following this comprehensive approach, you can create a lasting addition that integrates seamlessly with your existing landscape.
Planning Your Catio: Assessing Your Yard and Needs
Start by evaluating your yard's layout. Measure available space next to the house or along a fence line. Consider local building codes early, as many areas require permits for permanent structures. Check for underground utilities before digging posts. Sketch a simple diagram of your yard, noting sun patterns, wind directions, and proximity to doors or windows for easy cat access.
For multiple pets, divide the space into zones with separate platforms and hiding spots to reduce conflicts. Predator-proofing begins at this stage: elevate the enclosure at least 12 inches off the ground and use reinforced bases. Consult resources from the ASPCA for guidance on safe outdoor environments for cats. Take time to observe your cats' behaviors indoors to determine preferred heights and resting spots before finalizing the design.
Understanding Local Regulations and Permits
Before breaking ground, research your city's zoning laws. Some neighborhoods restrict structure heights or require setbacks from property lines. Contact your local building department to confirm requirements. This step prevents costly rework later and ensures your DIY catio remains compliant for years to come.
Material Choices: Wood Versus Wire Mesh Options
Selecting durable, weather-resistant materials is key for long-term use in varying climates. Pressure-treated lumber offers strength for frames but requires sealing. Wire mesh options like galvanized hardware cloth provide visibility and security; choose 1/2-inch mesh to prevent predator entry. Wood frames are easier for beginners to cut and assemble, while mesh excels in flexibility for custom shapes. Combine both: wood for structure and mesh for walls and roof. Avoid cheap chicken wire, as it rusts quickly and fails against determined animals. Consider cedar or redwood alternatives for natural rot resistance in humid regions.
When comparing options, wood provides better insulation in colder months while mesh allows maximum airflow. Test small samples in your yard to see how materials weather over a few weeks. This hands-on approach helps avoid common mistakes such as selecting untreated lumber that warps after the first rain.
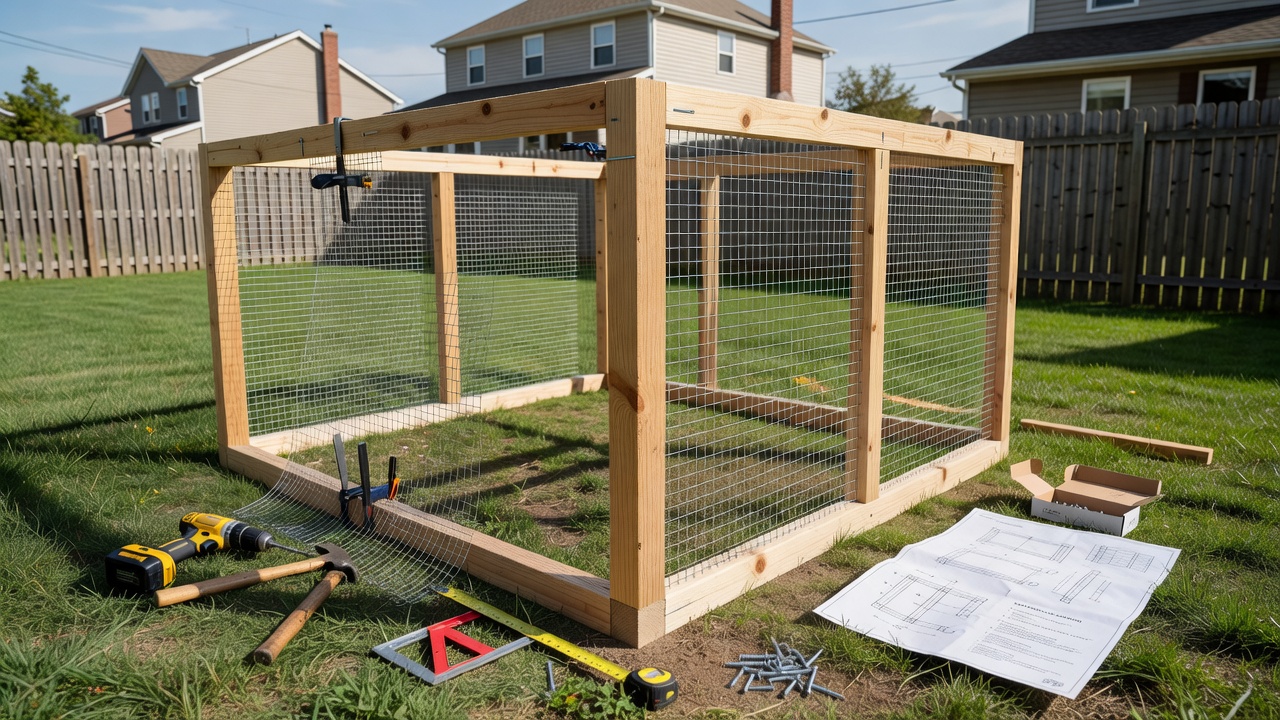
Step-by-Step Construction for Beginner to Intermediate Levels
- Build the frame using 2x4 lumber cut to your measurements, ensuring all corners are square with a carpenter's square.
- Attach mesh panels securely with staples and screws, overlapping edges by at least two inches for added strength.
- Install a door with a latch system for easy access, adding a spring-loaded hinge to keep it closed automatically.
- Add a roof using polycarbonate panels for shade and rain protection, sloping slightly for water runoff.
- Secure the base to existing structures or ground stakes, burying mesh at least six inches deep around the perimeter.
- Apply weatherproof sealant to all wood surfaces and check for sharp edges that could injure pets.
These steps suit fixer-uppers with basic tools like drills and saws. Test stability at each stage and work with a helper when lifting larger panels. Mistakes to avoid include rushing the mesh attachment, which can leave gaps that predators exploit.
Predator-Proofing Techniques and Safety Enhancements
Effective predator-proofing requires multiple layers. Use buried apron mesh to deter digging animals like foxes. Reinforce the roof with extra mesh layers and consider motion-activated lights around the perimeter. For suburban areas with raccoons or owls, add a solid top section over resting areas. Always double-check connections after installation and perform monthly inspections.
Adding Enrichment Features: Climbing Platforms and Shaded Lounges
Enrichment keeps cats engaged. Install staggered shelves and ramps for climbing. Include shaded areas with weatherproof fabric covers and cozy beds. Water-resistant tunnels or perches near windows connect the catio to indoor spaces. Add interactive elements such as hanging toys, scratching posts made from sisal rope, and puzzle feeders attached to platforms. Real suburban examples show success with modular designs that expand over time, such as attaching to a deck in a 1950s ranch home or extending along a chain-link fence in a newer subdivision.
Real-World Examples from Suburban Fixer-Uppers
In one Midwest example, a family converted an unused side yard into a two-zone catio using reclaimed deck lumber and heavy-duty mesh. The project integrated with their existing fence and allowed three cats to enjoy separate sunning and play areas. Another coastal renovation featured elevated platforms to avoid flooding while providing ocean breezes. These cases highlight the importance of adapting designs to local climate and pet personalities.
Cost Breakdowns and Comparisons for Budget-Friendly Builds
Focus on affordable upgrades that stay under modest budgets for most DIY enthusiasts as of 2026-09-03. Wood and mesh combinations often prove economical compared to pre-built units. Prioritize quality mesh to avoid replacements later. Compare local hardware store options versus online bulk purchases to optimize spending while maintaining quality.
Maintenance Tips and Long-Term Care
Inspect mesh and wood seasonally for wear. Clean with mild soap and check latches regularly. Trim nearby vegetation to prevent overgrowth that could compromise security. For long-term use, plan annual touch-ups with sealant and replace any rusted hardware promptly. Resources from the AVMA offer additional insights into maintaining safe environments for pets.
FAQ: Building Codes, Permits, and Common Questions
- Do I need a permit? Many municipalities require one for structures over a certain size; consult local zoning offices.
- How do I predator-proof effectively? Use buried mesh barriers and elevated designs.
- What about maintenance in harsh weather? Apply sealants annually and reinforce roofs.
- Can I expand the catio later? Yes, modular designs allow easy additions as your pet family grows.
Following these guidelines creates a safe, enriching outdoor space tailored to your pets and property. With thoughtful planning and execution, your DIY catio will provide years of enjoyment and peace of mind.
No comments yet. Be the first!