 Fixated on Home
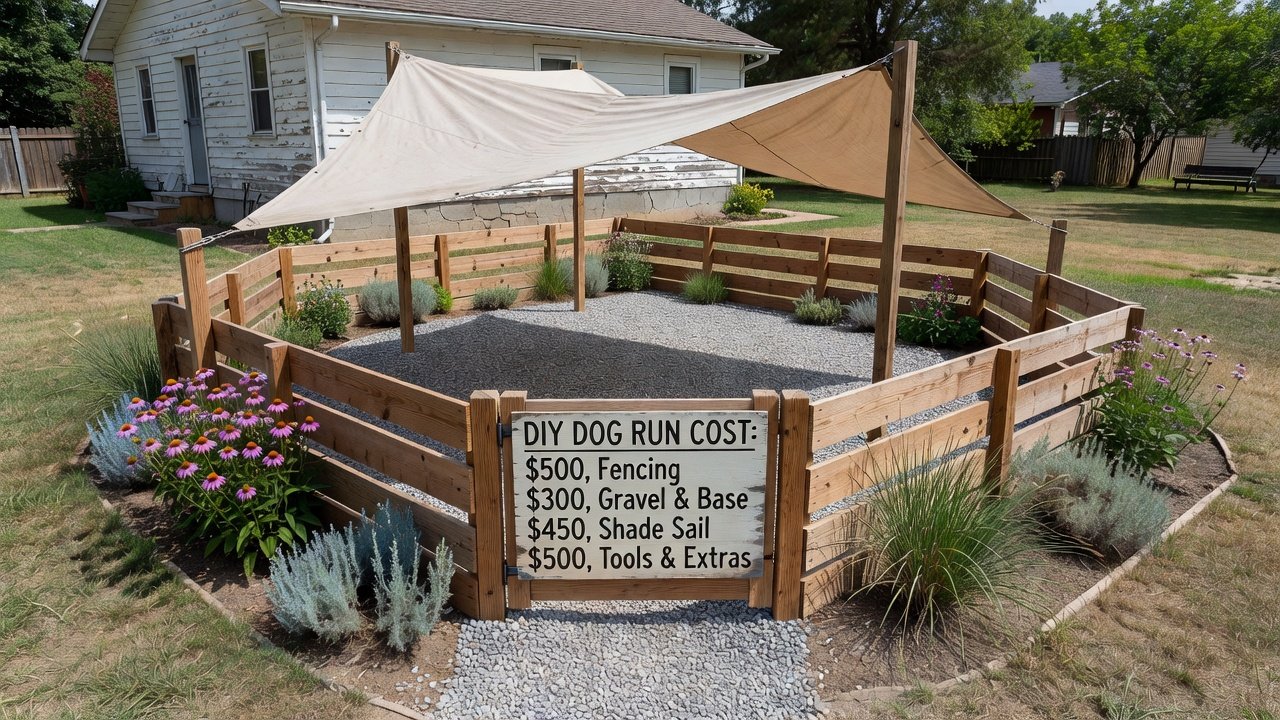
Introduction to Building Your Own Outdoor Dog Run
Homeowners with fixer-upper yards often seek practical ways to improve outdoor spaces while adding pet-friendly features. A custom DIY dog run provides a secure area for dogs to exercise, integrates with existing landscaping, and aligns with 2026 trends in sustainable, low-maintenance upgrades that can boost property value. This guide walks beginners through every stage, from planning to completion, using budget-friendly techniques that emphasize durability and environmental responsibility.
Whether your yard has uneven terrain or limited space, careful design ensures the run withstands weather and requires minimal upkeep. Real-world examples show how simple fencing and shade structures transform underused areas into functional pet zones. For instance, a couple in the Midwest converted a sloped corner of their property into a 10-by-20-foot run that now blends seamlessly with their vegetable garden beds. By focusing on 2026 priorities like water conservation and recycled materials, these projects not only improve daily life with pets but also contribute to higher resale appeal in competitive housing markets.
Site Planning and Assessment
Start by evaluating your yard for the ideal location. Measure available space, noting sun exposure, slope, and proximity to the house. Choose a spot with natural drainage to prevent pooling water, which can lead to mud and health issues for pets. Consider how the run connects to existing paths or gardens for seamless landscaping integration. Walk the property at different times of day to observe sunlight patterns and wind directions, as these factors influence both comfort for your dog and material longevity.
Check local regulations early. Many areas require permits for structures over a certain size, even simple enclosures. Contact your municipality to confirm requirements and avoid costly revisions later. Soil testing is another key step; clay-heavy soils may need extra amendment for proper drainage, while sandy areas drain quickly but could shift under heavy use. Mapping utilities underground prevents accidental damage during post installation. Homeowners who skip this phase often face setbacks, such as discovering buried cables midway through a project.
Material Selection for Durability and Sustainability
Opt for weather-resistant materials that support 2026 eco-friendly practices. Pressure-treated lumber, galvanized wire fencing, and recycled composite decking offer longevity with lower environmental impact. Compare options: chain-link fencing provides visibility and airflow, while wooden privacy panels add shade and aesthetics. Recycled plastic lumber resists rot without chemical treatments, making it a strong choice for frames that touch the ground.
For budget projects, source materials from local home improvement stores. Focus on items that resist rust and rot to reduce long-term replacement needs. Look for FSC-certified wood when possible to ensure responsible forestry. A practical example involves using leftover decking from a previous patio project to create the run's base edging, cutting costs while diverting waste from landfills. Always prioritize non-toxic finishes to keep the space safe for curious pets that might chew on surfaces.
Step-by-Step Construction Process
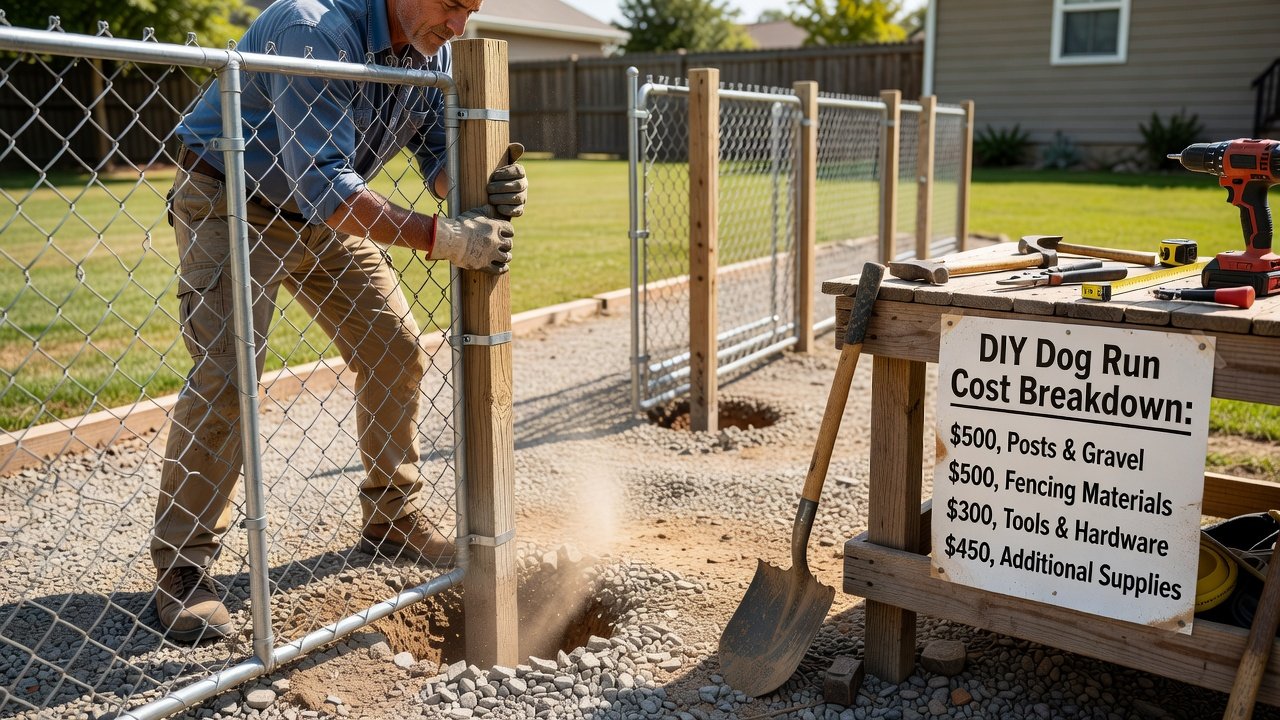
Begin with ground preparation: clear vegetation, level the area, and install a gravel base for stability. Next, set posts at intervals of 6 to 8 feet, ensuring they are anchored deeply for wind resistance. Attach fencing securely, double-checking all connections for gaps that could allow escapes. Use concrete footings in regions with freeze-thaw cycles to prevent heaving over time.
Add a gate with a self-closing latch for easy access and security. Incorporate a shaded section using a simple pergola or sail cloth to protect dogs from extreme heat or rain. Work in stages: complete the perimeter first, then add interior features like raised platforms for resting. One homeowner documented their build by photographing each phase, revealing how minor adjustments to post angles improved overall stability. Tools needed include a post-hole digger, level, wire cutters, and a drill for efficient assembly.
Drainage Solutions and Weather Resistance
Effective drainage prevents standing water. Install French drains or slight grading away from the run. Use permeable gravel or pavers that allow water to seep through while keeping the surface dry. These methods align with sustainable practices promoted by environmental authorities such as the Environmental Protection Agency. In areas prone to heavy rainfall, incorporate swales along the perimeter to channel water toward garden beds rather than letting it pool inside the enclosure.
For added protection, apply sealants to wood components and choose UV-resistant fabrics for shade covers. These steps ensure the structure holds up through seasonal changes. Weather resistance also involves selecting hardware like stainless-steel screws that won't corrode in coastal or humid climates. Regular monitoring after storms helps identify any emerging issues before they worsen.
Integrating with Landscaping and Safety Checklist
Blend the dog run into your yard by planting native shrubs along the perimeter for natural barriers and visual appeal. Avoid toxic plants that could harm pets. Real examples include runs bordered by hardy grasses that require little watering, creating a low-maintenance transition zone. Mulch pathways leading to the run reduce tracking of dirt into the house and enhance the overall aesthetic.
- Verify all fencing is at least 6 feet tall to deter jumping.
- Inspect for sharp edges and secure loose wires weekly.
- Provide fresh water access and shelter from elements.
- Ensure the gate locks firmly and test it regularly.
- Clear debris to maintain a clean, hazard-free zone.
- Position the run away from busy roads to minimize stress from noise and traffic.
- Incorporate non-slip surfaces inside for older dogs or puppies.
2026 Trends in Sustainable Dog Run Design
Current trends highlight modular designs that allow future expansion and the use of solar-powered lighting for evening visibility. Incorporating rain barrels nearby collects runoff for garden irrigation, tying the run into broader water-wise landscaping. These features not only support environmental goals but also appeal to buyers looking for modern, efficient homes.
Cost Comparisons and Value Boost
Many successful builds stay under $500 as of 2026-09-05 by using reclaimed materials and basic tools. A simple chain-link design might total $300–$450, while adding shade and drainage features approaches the upper limit. These affordable upgrades enhance curb appeal and appeal to future buyers seeking pet-ready homes.
FAQ: Common Challenges and Solutions
Do I need a permit for a dog run?
Requirements vary by location. Always verify with local building departments before starting construction to stay compliant.
How do I handle maintenance?
Monthly inspections for wear, combined with seasonal cleaning, keep the run in top shape. Sustainable materials reduce the frequency of repairs.
What if my yard has poor soil?
Improve drainage with added gravel layers and consider raised platforms for the main activity area.
Can the run be moved later?
Modular post systems allow relocation with minimal disruption, ideal for renters or those planning future yard changes.
How do I keep the area odor-free?
Regular scooping combined with enzymatic cleaners and good airflow prevents buildup and keeps neighbors happy.
Conclusion
Creating a DIY outdoor dog run transforms fixer-upper yards into welcoming spaces for both pets and owners. By following these steps and focusing on sustainability, you achieve a durable, value-adding feature with minimal expense. Start planning today to enjoy the benefits throughout 2026 and beyond, knowing your project supports both animal welfare and responsible property improvement.
No comments yet. Be the first!