 Fixated on Home
Introduction to DIY Deck Construction on Fixer-Uppers
Adding a deck can dramatically enhance the outdoor living space of any fixer-upper property, turning neglected yards into inviting areas for family gatherings, relaxation, and entertainment. Homeowners in 2026 often seek budget-conscious ways to improve their homes, and a well-built deck integrates seamlessly with existing structures while adding value and functionality. This comprehensive guide walks through every stage of the process, from initial evaluation to final maintenance routines, ensuring your project succeeds without unnecessary complications. Whether you are addressing an uneven backyard or incorporating the deck around mature trees and garden beds, careful planning leads to professional-looking results that withstand weather and daily use.
Site Assessment and Planning for Long-Term Success
Before breaking ground, conduct a thorough site assessment to identify potential challenges. Measure the available space accurately and note the slope of the land, soil conditions, and proximity to the house foundation. Check for buried utilities by contacting local services and observe sun patterns throughout the day to determine optimal deck orientation for shade or warmth. Integration with existing yard features such as patios, fences, or flower beds requires thoughtful alignment so the new structure enhances rather than disrupts the landscape. Sketch a simple layout that accounts for access points like doors or pathways, and consider future additions such as built-in seating or planters. This upfront work prevents costly revisions later and ensures the deck complements the overall fixer-upper renovation vision.
Material Selection: Wood Versus Composite Options
Choosing the right materials forms the foundation of a durable deck. Pressure-treated pine or cedar provides a traditional appearance and natural texture at a lower initial investment, though it requires periodic sealing to prevent warping and decay. Composite decking, made from recycled plastics and wood fibers, delivers consistent color, resistance to fading, and minimal upkeep, making it ideal for busy homeowners. Evaluate factors like regional climate, foot traffic expectations, and aesthetic goals when comparing the two. Wood may suit rustic fixer-upper styles, while composites blend well with modern updates. Both options can be sourced responsibly, and selecting materials rated for outdoor exposure guarantees longevity across seasons.
- Wood advantages include easy customization and lower upfront material volume needs.
- Composite benefits center on fade resistance and splinter-free surfaces over time.
- Hybrid approaches allow mixing boards for visual interest without full replacement costs.
Essential Tools List and Detailed Safety Protocols
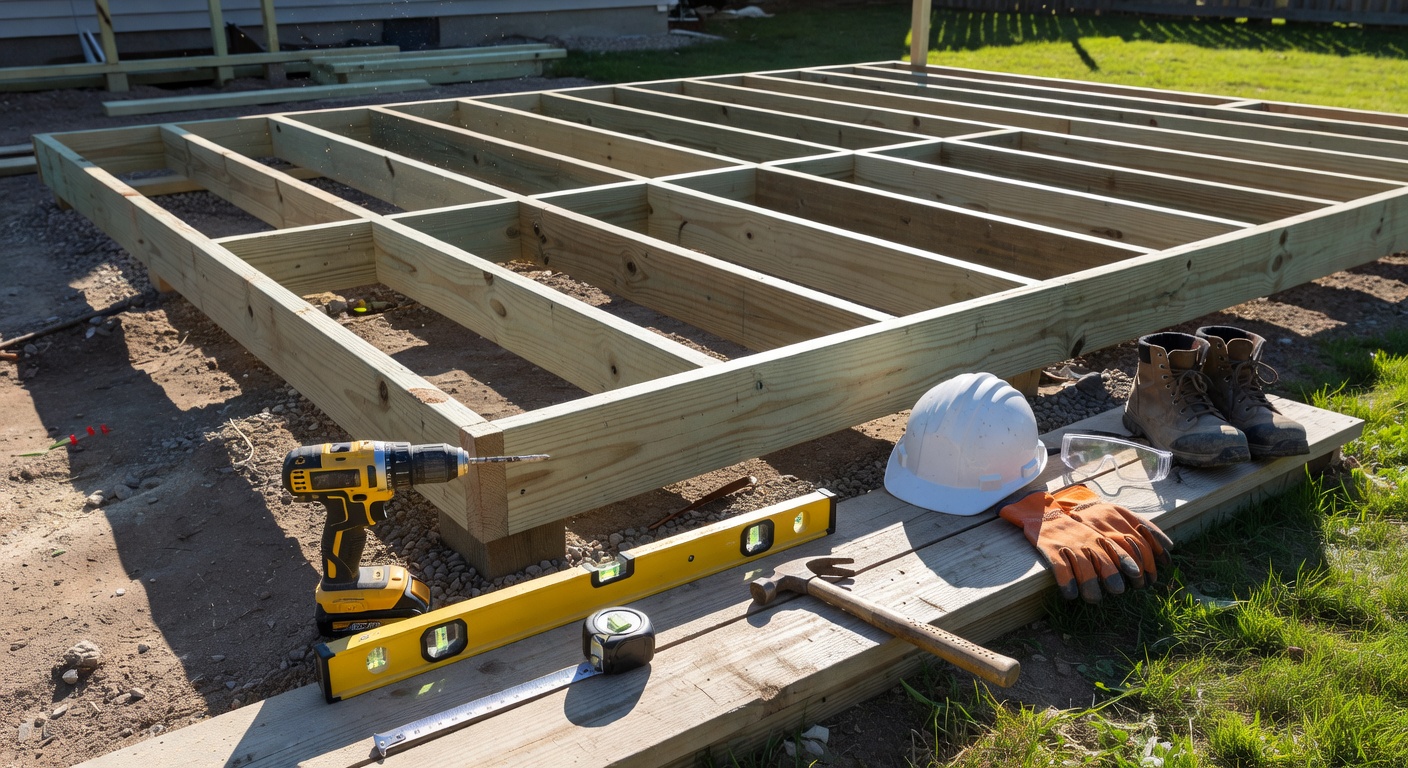
Assemble a complete toolkit before starting construction. Core items include a circular saw for precise cuts, cordless drill for fastening, spirit level for alignment checks, tape measure, framing hammer, post hole digger or auger, speed square, and clamps for holding pieces steady. Additional supplies such as safety glasses, work gloves, ear protection, dust masks, and a first-aid kit round out the essentials. Safety protocols emphasize proper lifting techniques to avoid strain, securing ladders on stable ground, and never working alone on elevated sections. Reference established guidelines from OSHA for fall protection and equipment handling. Always clear the workspace of debris and verify that power tools are in good condition with intact cords.
Step-by-Step Construction Instructions
Preparing the Foundation and Framing the Deck
Begin by marking the perimeter with stakes and string, then excavate for footings at depths below the frost line in your area. Pour concrete into forms around galvanized post anchors, allowing full curing before proceeding. Attach a pressure-treated ledger board to the house rim joist using lag screws and flashing to prevent moisture intrusion. Construct the outer frame with beams supported by posts, ensuring all connections are square and level. Install interior joists at consistent spacing, typically sixteen inches on center, and add blocking between them for added rigidity. This phase demands patience, as accurate framing supports the entire structure and prevents future sagging or uneven surfaces.
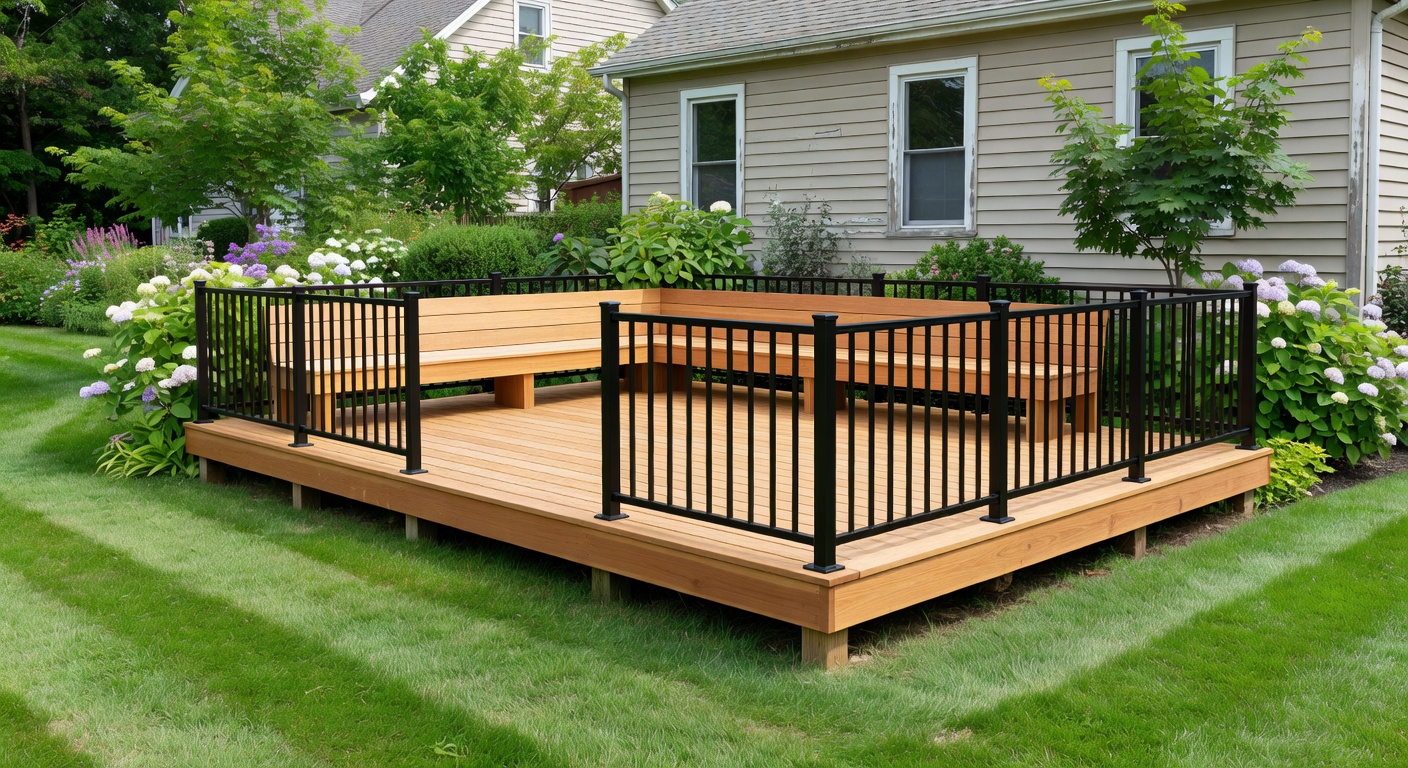
Installing Decking Boards and Railings
Position decking boards perpendicular to the joists, starting from the house edge and working outward. Secure each board with coated screws driven at an angle to allow for natural expansion, maintaining uniform gaps recommended by the material manufacturer. Trim ends neatly once all boards are placed. For railings, attach posts to the frame at code-required intervals and connect horizontal rails topped with a cap board. Install balusters or pickets to meet safety standards for height and spacing. These steps create both functional walking surfaces and protective barriers that enhance the finished appearance.
Adding Stairs, Finishing Details, and Final Touches
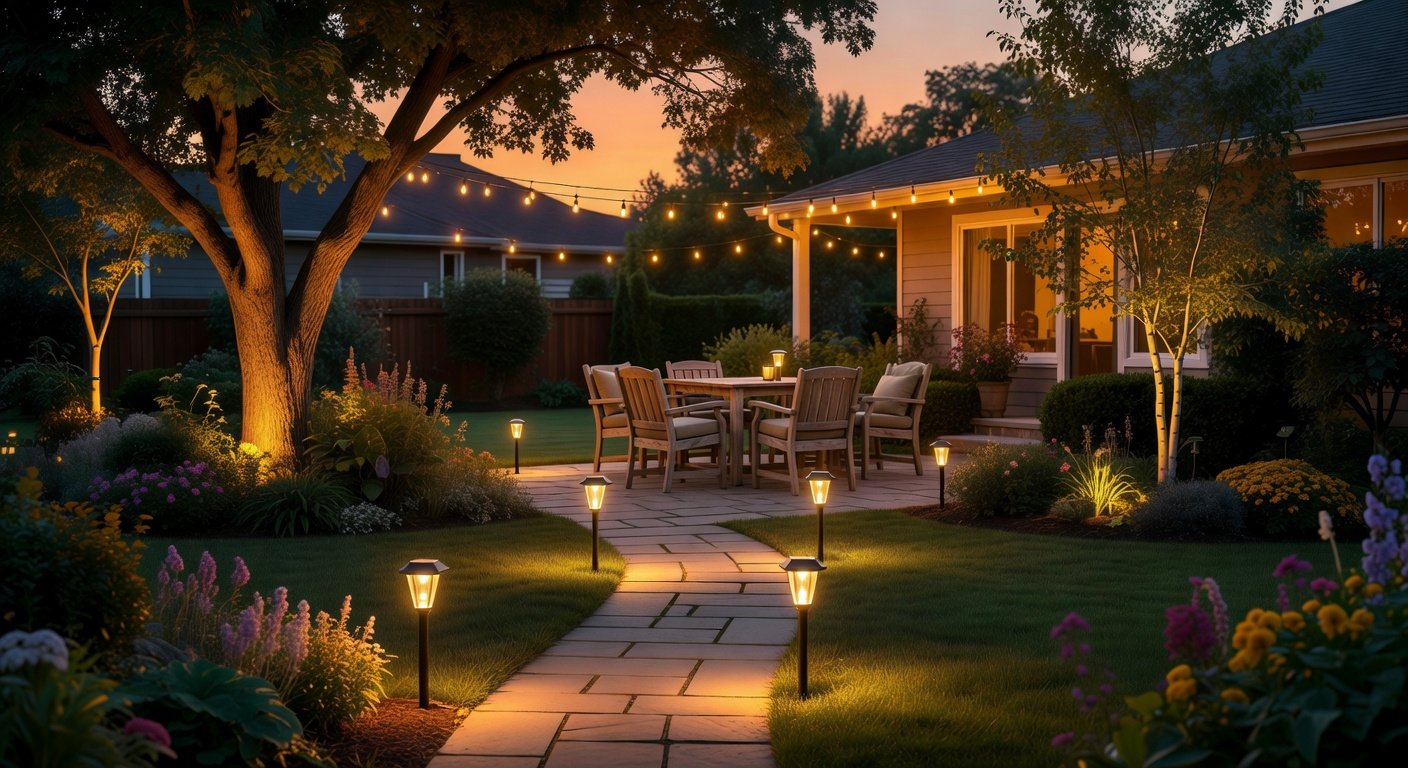
Build stairs using stringers cut to match the deck height, securing treads and risers firmly. Apply any chosen finish such as stain or sealant to exposed wood surfaces after allowing time for acclimation. Install lighting fixtures under railings or along steps for improved nighttime visibility and ambiance. Finally, inspect all fasteners and connections, tightening as needed before declaring the project complete.
Timeline Estimates, Common Pitfalls, and How to Avoid Them
A typical deck project spans two to four weekends for a moderately sized structure when working with basic tools and helpers. Break the timeline into phases: assessment and permitting one week, foundation work the next, framing and decking the following, and finishing touches last. Common pitfalls include inadequate footing depth leading to shifting, skipped flashing that invites rot, or insufficient joist spacing causing bounce underfoot. Avoid these by double-checking measurements at every stage and consulting local building departments early. Another frequent error involves poor drainage planning, which can be mitigated by slight deck slopes away from the house and proper gravel beds under footings.
Before-and-After Examples and Ongoing Maintenance
Many successful renovations feature overgrown or uneven lots transformed into level, usable decks that connect indoor and outdoor living. One example involved a sloped backyard where tiered sections created multiple seating zones around existing trees. Maintenance involves seasonal cleaning with mild soap solutions, annual inspections for loose hardware, and reapplication of protective coatings on wood surfaces every eighteen to twenty-four months. Composite decks need only occasional washing to retain their appearance. Following these routines preserves structural integrity and appearance for years.
FAQ
- Do I need permits for a DIY deck? Most municipalities require permits for decks exceeding certain heights or attached to the home; always verify requirements through your local building department before construction begins.
- How do I integrate the deck with existing landscaping? Design around trees by leaving open spaces in the frame and use complementary materials that match nearby patios or fences for cohesive flow.
- What maintenance schedule works best? Clean the surface monthly during peak seasons, inspect fasteners quarterly, and address any soft spots immediately to prevent larger repairs.
- Are there eco-friendly material choices? Yes, look for composites with high recycled content or sustainably harvested wood certified by recognized forestry programs, and reference resources from EPA for guidance on low-impact selections.
No comments yet. Be the first!