 Fixated on Home
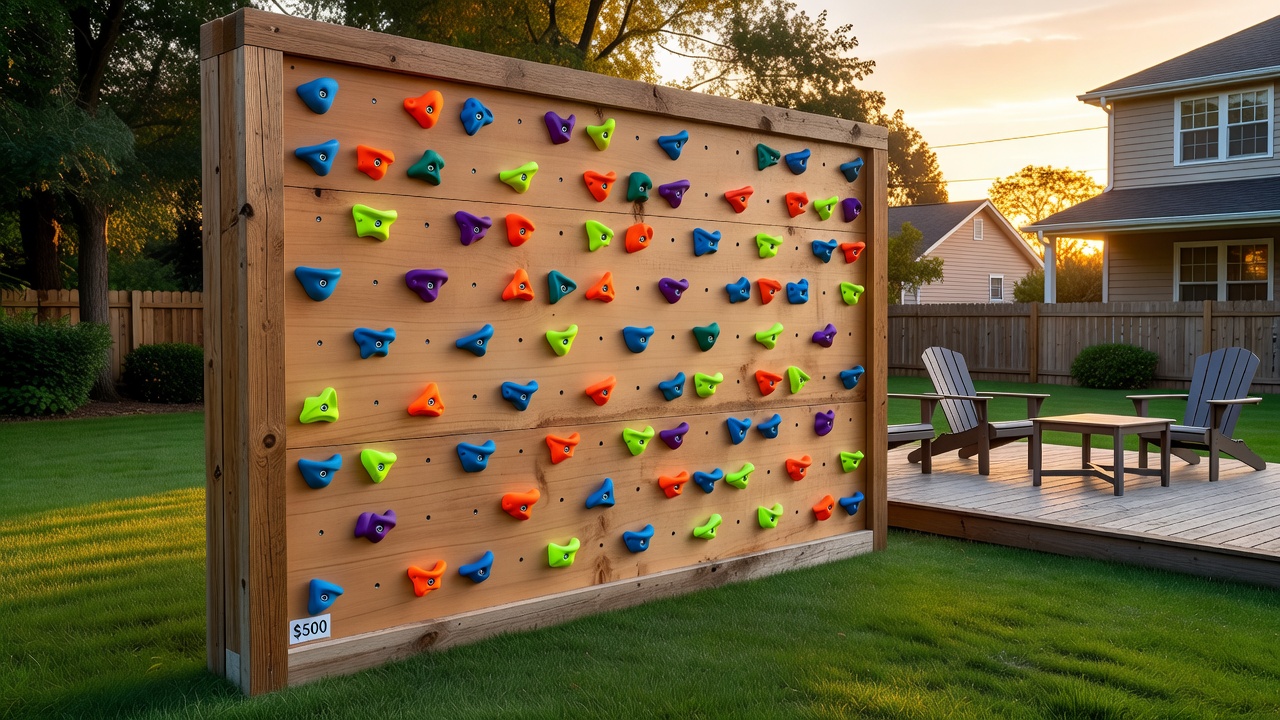
Introduction to DIY Outdoor Climbing Walls
Homeowners seeking distinctive fixer-upper projects in 2026 increasingly explore DIY outdoor climbing walls. These installations merge practical home improvement with recreational fitness, creating a custom adventure zone directly in the backyard. Unlike generic gym memberships, a well-planned wall encourages daily activity while enhancing property appeal. This comprehensive guide walks through site evaluation, material choices focused on longevity, rigorous safety measures, and detailed phased building instructions covering framing, padding, and hold placement. Additional coverage includes adapting the design for varying experience levels, blending it with current landscaping, cost considerations, and protective strategies against the elements. Real-world case studies, exhaustive tool lists, and side-by-side comparisons to commercial options round out the resource, helping readers complete a project that stands the test of time.
Site Assessment for Your Climbing Wall
Thorough preparation starts with a detailed inspection of the outdoor area. Begin by mapping the available vertical surface, whether an existing fence, shed wall, or newly erected frame. Record precise measurements including height, width, and clearance zones to ensure safe fall areas. Verify ground stability by testing for soft spots or slopes that could compromise footing. Factor in environmental elements such as prevailing wind direction, seasonal sun angles, and nearby vegetation that might cast shade or drop debris. For instance, properties in humid regions benefit from extra ventilation planning to reduce moisture buildup behind the wall. Evaluate any adjacent structures for reinforcement needs, confirming they can handle repeated dynamic forces from climbers of different weights.
Material Selection for Durability
Selecting components rated for continuous exterior exposure prevents premature failure. Opt for pressure-treated lumber in framing to resist insects and decay. Marine-grade plywood serves as the primary climbing surface due to its superior moisture resistance compared to standard sheets. Climbing holds crafted from high-density polyurethane offer grip consistency across temperature fluctuations. Impact-absorbing padding requires closed-cell foam at least two inches thick, topped with UV-stabilized vinyl fabric. Hardware such as stainless steel bolts and T-nuts ensures corrosion-free performance. Always cross-reference manufacturer specifications for load ratings before purchase to match anticipated user weights and activity intensity.
Essential Tool Checklist
- Circular saw with fine-tooth blade for clean plywood cuts
- Cordless drill and impact driver with multiple bit sets
- Four-foot level, laser measurer, and framing square
- Socket wrench set and adjustable wrenches for hardware tightening
- Safety equipment including ANSI-rated goggles, cut-resistant gloves, and dust mask
- Belt sander and orbital sander for surface preparation
- Paint rollers and brushes for applying sealants
- Stud finder and chalk reel for accurate layout marking
- Extension cords rated for outdoor use and sawhorses for material support
Safety Protocols to Follow
Adhering to established guidelines minimizes injury risks during both construction and ongoing use. Reference recommendations from the U.S. Consumer Product Safety Commission regarding structural loads and fall zones. Install landing mats extending a minimum of six feet from the base and at least two feet beyond the wall edges. Incorporate redundant anchoring points and inspect every connection point for tightness after each session. The Occupational Safety and Health Administration provides additional resources on fall protection that translate well to residential builds. Always supervise novice users and establish clear rules such as mandatory helmet use for heights above six feet.
Phased Construction Steps
Execute the build in logical stages to maintain control and quality. Start by laying out the frame on the ground for pre-assembly checks. Secure vertical posts into concrete footings if no existing wall exists. Attach horizontal cross-bracing at regular intervals for rigidity. Mount the plywood panels using construction adhesive plus screws every six inches along edges. 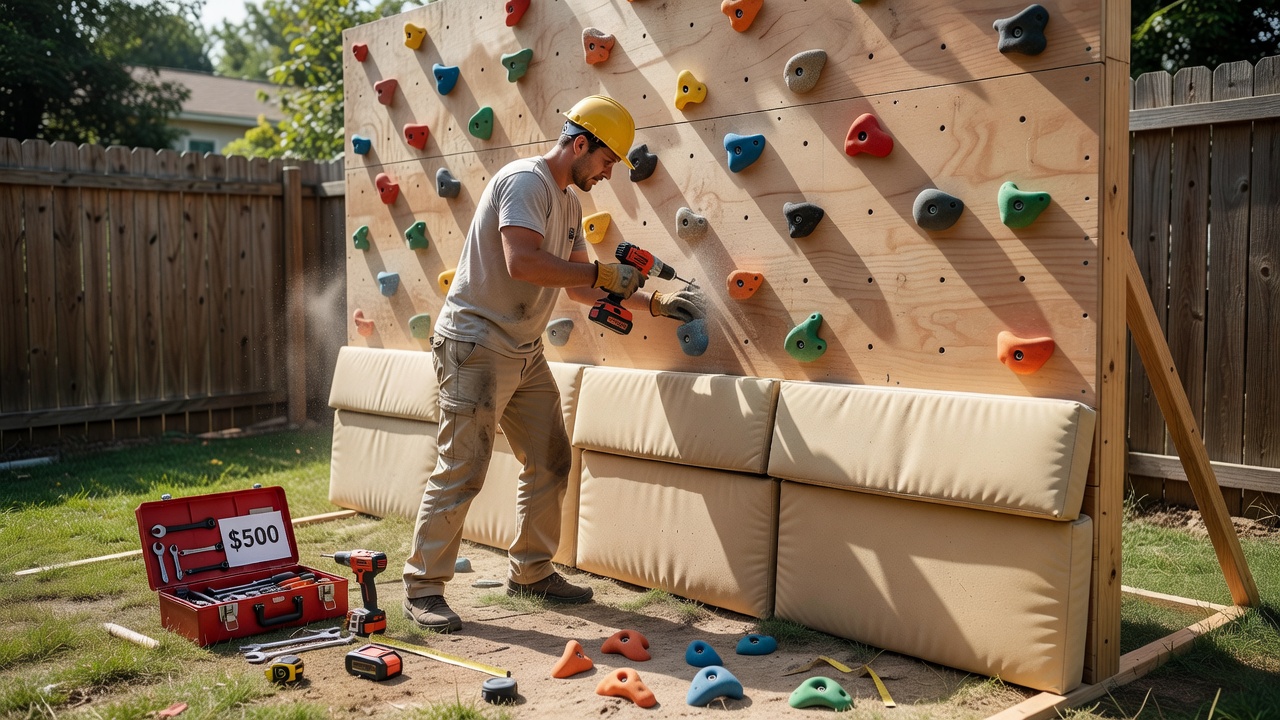
Framing and Foundation Details
Position 4x4 posts at least 24 inches into the ground with concrete encasement for freestanding designs. Space vertical studs sixteen inches on center and double up at corners. Add diagonal bracing to counteract lateral movement during climbs.
Padding and Holds Installation
Cut foam sheets to exact panel dimensions and adhere with construction adhesive before stapling the vinyl cover. Insert T-nuts from the rear of the plywood in a staggered grid pattern every eight to twelve inches. Test each hold for spin resistance after installation.
Scaling Options for Different Skill Levels
Design flexibility allows progression from beginner to expert routes on the same structure. Larger, jug-style holds placed on low-angle sections suit children and novices. Intermediate users appreciate mixed hold types including slopers and pinches. Advanced configurations incorporate overhangs up to 30 degrees with smaller edges and pockets. Modular systems using bolt-on holds enable frequent route changes without tools beyond a wrench.
Integrating with Existing Yards
Thoughtful placement enhances both functionality and aesthetics. Align the wall parallel to garden beds so climbers can enjoy views of landscaping. Paint the structure in earth tones matching fences or house trim. Incorporate lighting for evening sessions and add storage benches at the base for shoes and chalk bags. Ensure irrigation lines and electrical outlets remain accessible yet protected.
Budget Breakdowns and Pre-Built Comparisons
DIY approaches typically remain under $500 as of 2026-08-20 through careful sourcing from local lumber yards and online hold suppliers. This contrasts sharply with pre-fabricated walls that often exceed several thousand dollars plus installation fees. Custom builds permit incremental upgrades, such as adding volume features later, while commercial products limit modifications. Homeowners report higher satisfaction from the hands-on process and exact fit to their space.
Weatherproofing Techniques
Multiple protective layers extend service life significantly. Apply two coats of exterior-grade polyurethane to all wood surfaces, sanding lightly between applications. Use galvanized or stainless fasteners exclusively. Install a sloped roof overhang above the top edge to divert rainwater. Reapply sealant annually and store removable holds indoors during winter months in cold climates.
Real-World Examples and Maintenance
A family in the Midwest constructed an eight-foot wall attached to their detached garage using salvaged decking lumber, completing the project over two weekends. They integrated native shrubs at the base for visual softening. Routine upkeep involves monthly bolt torque checks, quarterly hold cleaning with mild soap, and immediate replacement of any cracked padding. Address surface cracks in sealant promptly to prevent water intrusion.
Common Mistakes to Avoid
Many first-time builders underestimate foundation depth, leading to wobbling. Always over-engineer anchors rather than relying on minimal fasteners. Another frequent error involves clustering holds too closely, which reduces route variety. Plan spacing deliberately and leave room for future additions. Skipping the sanding step creates splinters that discourage use.
FAQ on Common Challenges
How do I ensure load-bearing capacity?
Verify existing walls with a structural engineer if attaching above eight feet. Add extra framing members and consult local permitting offices for guidance on residential loads.
What maintenance is needed in 2026?
Establish a schedule of visual inspections every two weeks, deep cleaning monthly, and full resealing twice yearly. Rotate hold positions seasonally to distribute wear evenly.
Can the wall accommodate multiple users safely?
Designate separate climbing lanes with clear ground markings. Limit simultaneous climbers to two for standard eight-foot widths and enforce strict spotting protocols.
Conclusion
Creating a DIY outdoor climbing wall represents an engaging 2026 fixer-upper endeavor that delivers fitness benefits, family entertainment, and increased property utility. Careful attention to planning, safety, and maintenance ensures the structure provides years of reliable enjoyment while complementing broader home renovation goals.
No comments yet. Be the first!