 Fixated on Home
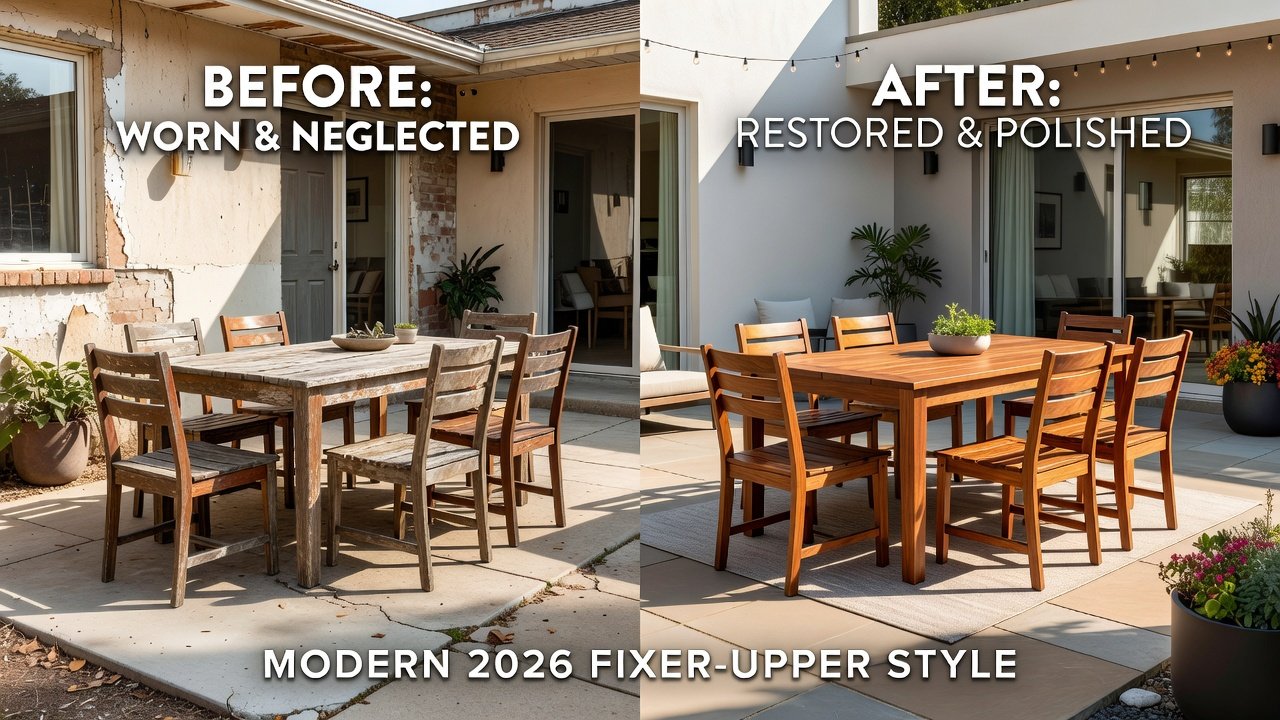
Introduction to Outdoor Furniture Restoration in 2026
Restoring outdoor furniture offers a budget-friendly way to enhance your home's curb appeal without purchasing new pieces. For fixer-uppers focusing on outdoor upgrades, this approach saves resources while delivering professional-looking results. In 2026, DIY enthusiasts are turning to weather-resistant techniques to revive wood, metal, and wicker items exposed to sun, rain, and temperature swings. Many homeowners discover that thoughtful restoration extends the life of cherished pieces by several seasons, turning potential discards into focal points of patios and decks. This guide provides in-depth strategies tailored for 2026 projects, emphasizing sustainable practices and durable finishes that withstand modern climate challenges.
Assessment starts by examining structural integrity. Check for rot in wood, rust on metal frames, and fraying in wicker weaves. This initial evaluation determines whether restoration is viable or if replacement makes more sense. Taking time upfront prevents wasted effort on irreparable items.
Assessing Your Outdoor Furniture for Restoration
Begin every project with a systematic inspection. For wooden pieces, probe joints with a screwdriver to detect soft spots indicating rot. Measure any cracks wider than a quarter inch, as these may require reinforcement. Metal frames need checking for weld failures and pitting from corrosion. Wicker requires testing weave flexibility; brittle strands often snap during cleaning. Document findings with photos to track progress and compare before-and-after results from similar real-world fixer-upper transformations.
Material Comparisons for Restoration Success
Wood furniture like teak or cedar responds well to sanding and sealing but requires regular maintenance. These hardwoods naturally resist moisture yet benefit from annual topcoats. Metal pieces, often aluminum or steel, demand rust removal and protective coatings; aluminum is lighter and less prone to heavy corrosion while steel offers superior strength when properly treated. Wicker, whether natural or synthetic, benefits from gentle cleaning to avoid breakage. Natural wicker absorbs stains differently than resin versions, affecting product choice. Comparing these helps prioritize projects based on your climate and skill level. In humid regions, prioritize metal and synthetic wicker over untreated wood to minimize future issues.
Tool Recommendations
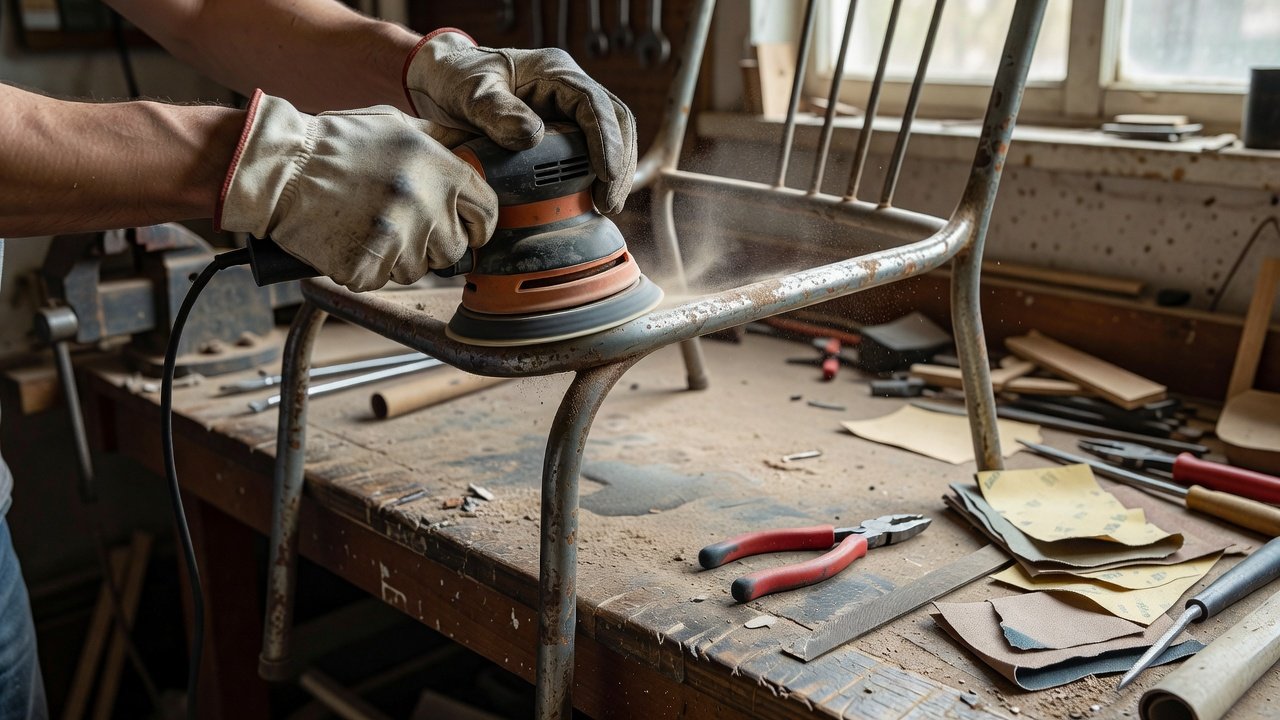
Essential tools include orbital sanders, wire brushes, paint sprayers, and protective gear. Quality sandpaper in various grits (80 to 220) ensures smooth surfaces. Opt for eco-friendly strippers and primers designed for exterior use to achieve durable finishes. Additional helpful items are drop cloths, tack cloths for dust removal, and mixing sticks for consistent paint blends. A heat gun can assist with stubborn old finishes on wood without excessive chemical use.
Step-by-Step Cleaning and Preparation
Begin with thorough cleaning using mild soap and water or pressure washers on low settings. Remove loose debris first with a soft brush, then apply cleaning solution and agitate gently. For metal, follow with a rust-dissolving solution and rinse thoroughly. Allow all pieces to dry completely, often 24 to 48 hours depending on humidity. Next, remove old finishes with chemical strippers, followed by sanding to create a smooth base. Work in sections to avoid missing spots. For metal, apply rust converters before priming. Always work in well-ventilated areas and test products on inconspicuous spots first.
Refinishing Techniques Using Weather-Resistant Products
Apply exterior-grade stains or paints in thin coats, allowing proper drying times between layers. Seal wood with UV-protectant varnishes formulated for outdoor exposure. For wicker, use flexible sprays that prevent cracking during temperature changes. Multiple thin applications outperform single heavy coats for longevity. On metal, two to three coats of enamel provide a factory-like finish resistant to chipping. Consider color choices that complement your home's exterior palette for cohesive curb appeal.
Safety Tips for DIY Projects
Wear respirators, gloves, and eye protection during sanding and chemical use. Follow guidelines from OSHA to minimize exposure risks. Dispose of waste responsibly per local regulations, and keep children and pets away from work areas. When dealing with older painted surfaces, reference EPA guidelines on lead-based paint handling to avoid health hazards. Store all materials securely after each session.
Before-and-After Examples from Real Projects
Homeowners have transformed faded teak benches into vibrant centerpieces using marine varnish. One suburban fixer-upper project revived a rusted steel dining set by wire-brushing, priming, and applying multiple enamel layers, resulting in a piece that withstood two harsh winters. Rusty patio sets regain elegance with powder-coat style paints. Wicker chairs with broken sections were rewoven using replacement strands before staining, creating inviting conversation areas. These examples highlight how small efforts yield dramatic curb appeal improvements across diverse material types.
Cost Considerations for Budget Renovations
Restoration remains a cost-effective strategy compared to full replacements, emphasizing quality materials over quantity. Focus on high-impact areas like seating surfaces first. Gathering supplies gradually across multiple weekends helps manage expenses while achieving professional outcomes.
Common Mistakes to Avoid
- Skipping proper drying times leading to bubbling finishes
- Using interior products outdoors that fail quickly
- Overlooking undercoats that cause premature peeling
- Applying finish in direct sunlight causing uneven drying
- Ignoring ventilation and risking chemical exposure
Ongoing Maintenance for Lasting Results
After restoration, inspect pieces seasonally for minor touch-ups. Store cushions indoors during off-seasons and cover furniture when not in use. Reapply protective sealants every two years in high-exposure locations to maintain appearance and structural integrity.
FAQ: Addressing Restoration Challenges
How do I handle severely damaged wicker?
Replace broken strands with matching materials and reinforce frames before refinishing to restore stability.
What weather conditions are ideal for painting?
Choose dry days between 50-85°F with low humidity for optimal adhesion and curing.
Can I restore furniture with existing lead paint?
Consult professionals and reference CDC resources for safe handling procedures.
How long does a typical restoration last?
With proper products, expect 3-5 years of weather protection before touch-ups become necessary.
Is it worth restoring plastic outdoor furniture?
Yes for minor scratches using specialized cleaners and UV protectants, though deep cracks may require replacement.
Restoring outdoor furniture empowers DIYers to create inviting spaces sustainably. Start small, follow these techniques, and enjoy the renewed outdoor living area for years to come.
No comments yet. Be the first!