 Fixated on Home
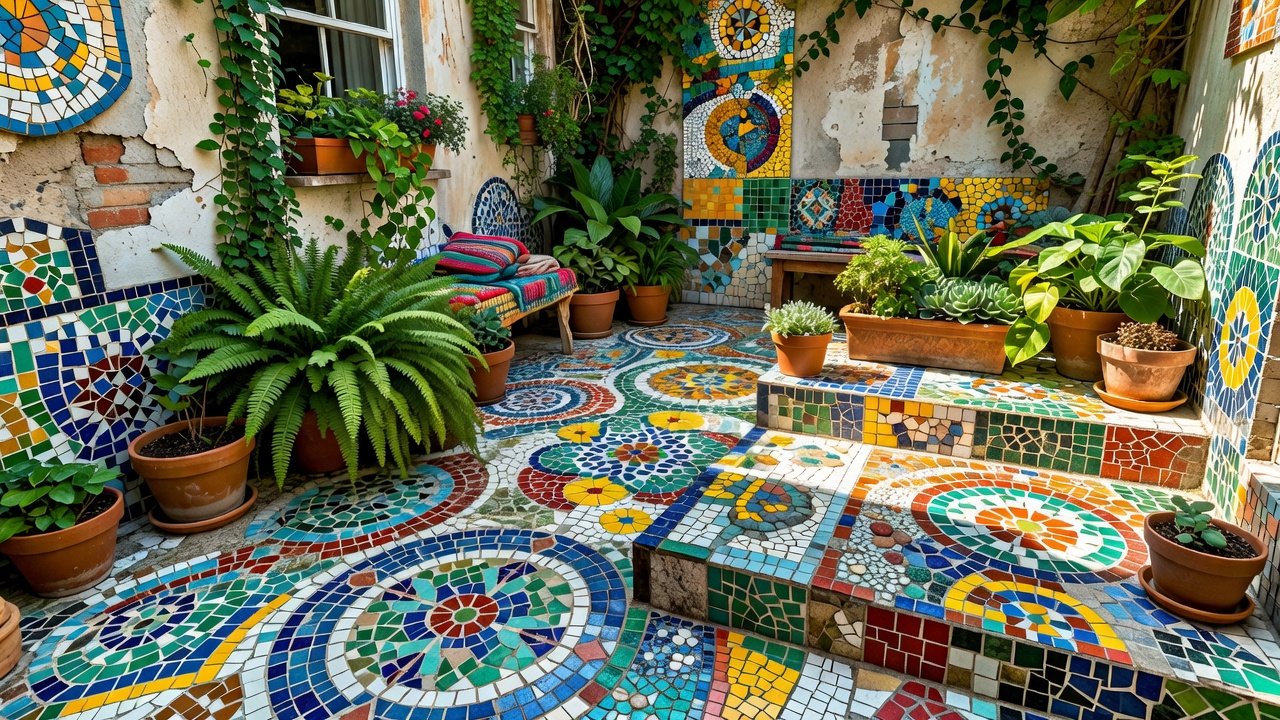
Transforming Outdoor Spaces with Mosaic Tiles in 2026
Fixer-upper homes frequently have outdoor areas that feel forgotten or underutilized, yet these spaces hold tremendous potential for creative transformation. Mosaic tile projects allow homeowners to blend artistic expression with practical home improvement, turning plain patios, walls, and pathways into durable, eye-catching features. In 2026, with increasing interest in sustainable and personalized renovations, mosaic work stands out as an accessible way to add value and character without requiring professional contractors.
These projects suit beginner to intermediate DIYers who enjoy hands-on work and want results that withstand weather exposure. By focusing on proper material choices and installation methods, you can create outdoor features that remain vibrant and functional for many seasons. This comprehensive guide covers every stage from initial planning through long-term maintenance, drawing on real renovation examples to illustrate successful outcomes.
Selecting the Right Materials for Long-Lasting Results
Material selection forms the foundation of any successful outdoor mosaic project. Porcelain and ceramic tiles designed for exterior applications resist moisture absorption and temperature fluctuations better than standard interior options. Porcelain in particular offers superior strength and comes in a wide range of colors and finishes, making it ideal for custom patterns. Natural stone such as slate or travertine provides excellent slip resistance for high-traffic pathways while adding organic texture.
Adhesives play an equally important role. Flexible thinset mortar formulated for outdoor use accommodates slight movements caused by ground settling or thermal expansion. Grout choices should prioritize epoxy-based or urethane formulas that resist staining, cracking, and water penetration. Always select products with explicit UV resistance ratings to prevent fading over time. For backing, cement board outperforms plywood in wet conditions because it does not swell or degrade when exposed to moisture. Consider sourcing remnant tiles from local suppliers to reduce waste and costs while achieving unique color combinations.
Design Planning and Inspiration
Effective design begins with accurate measurements of the target surface. Sketch multiple layout options on graph paper, experimenting with repeating motifs, borders, or focal medallions. Consider how the mosaic will interact with existing landscaping, architectural lines, and furniture placement. Color theory helps here: cool tones create calm retreats while warm hues energize gathering spaces. Incorporate elements like leaf shapes or abstract waves to echo nearby gardens.
Real renovation examples demonstrate the impact of thoughtful planning. One project converted a cracked concrete slab into a geometric patio featuring interlocking diamond patterns in earth tones, dramatically increasing usable outdoor living space. Another homeowner added a mosaic accent wall beside a garden path using leftover tiles in blues and greens, creating visual continuity between house and yard. Test your final design by arranging tiles temporarily on the surface before permanent installation begins.
Step-by-Step Installation Techniques
Installation success depends on thorough surface preparation. Begin by cleaning the area to remove dirt, grease, and loose debris. Level uneven sections with a self-leveling compound designed for exteriors. Apply a waterproofing membrane on patios and walls to protect the underlying structure from moisture intrusion.
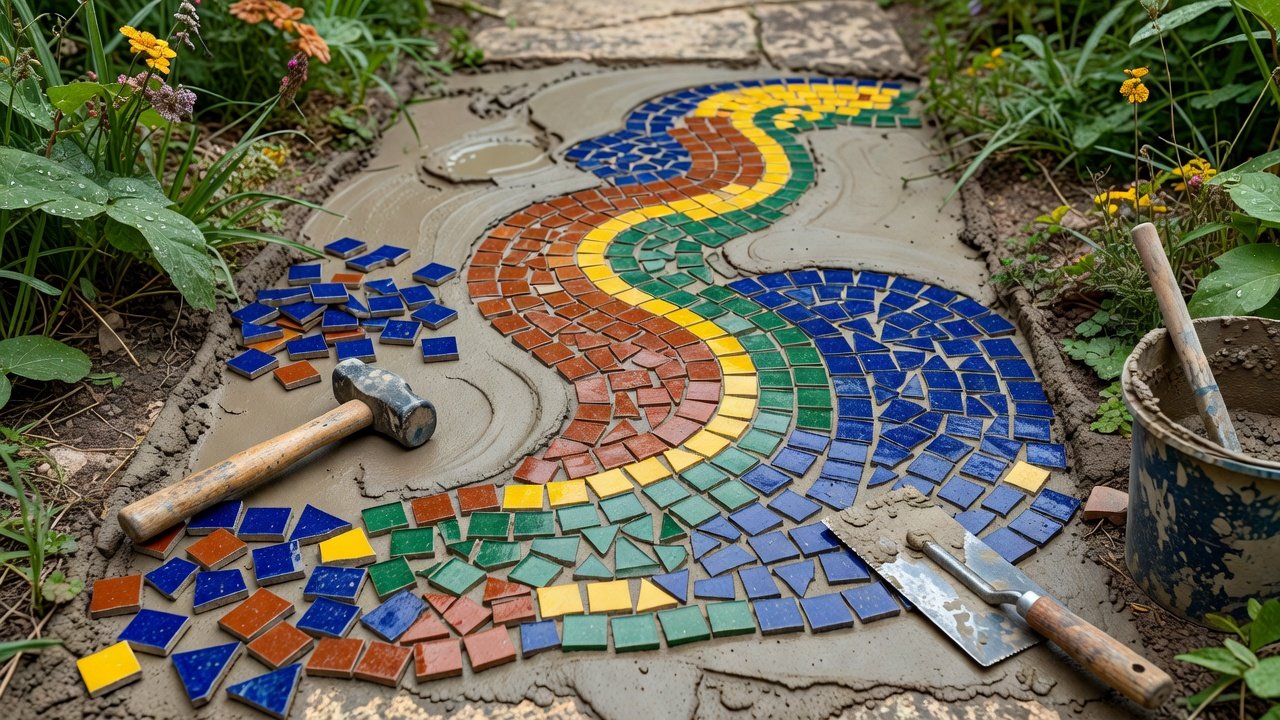
For patios, spread thinset with a notched trowel in small workable sections, then press tiles firmly into place while maintaining consistent joint spacing. Walls require starting at the bottom and working upward, using spacers and a level to keep rows straight. Pathways benefit from a compacted gravel base topped with sand for drainage and stability. After setting tiles, allow the adhesive to cure fully before grouting. Apply grout diagonally across joints, then wipe excess with a damp sponge. Finish with a quality sealer suited to your tile type.
Weatherproofing Tips for 2026 Projects
Weatherproofing extends the lifespan of outdoor mosaics significantly. Apply penetrating sealers to both tiles and grout lines immediately after installation and reapply annually. Ensure adequate slope for water runoff on flat surfaces to prevent pooling. In regions with harsh winters, incorporate expansion joints every few feet to accommodate freeze-thaw cycles. Choose frost-proof tiles and avoid materials prone to spalling. Regular inspections for cracks or loose pieces allow early repairs that maintain structural integrity through changing climate conditions.
Essential Tools and Cost Breakdowns
Core tools include a wet saw or manual tile cutter for precise cuts, notched trowels in various sizes, a rubber mallet for seating tiles, a spirit level, mixing buckets, and safety gear such as gloves and knee pads. Additional helpful items are spacers, grout floats, and sponges for finishing work. Many of these tools can be rented affordably if purchased new seems unnecessary.
Budget-conscious approaches focus on smaller surface areas first and utilizing tile remnants or clearance stock. Sourcing from multiple suppliers and planning designs around available colors keeps expenses manageable while still achieving professional-looking results. Always factor in extra material for mistakes and future repairs.
Before-and-After Examples from Real Renovations
One notable transformation involved a neglected side yard where an old concrete walkway received a flowing river-stone mosaic pattern that improved both aesthetics and safety. The result created a welcoming entrance that increased curb appeal noticeably. Another renovation covered a plain stucco wall with a vibrant sunburst design using small glass and ceramic pieces, turning an eyesore into a conversation piece visible from the main living area.
These examples highlight how mosaics can address specific problems like uneven surfaces or lack of visual interest while adding personal artistic touches. Documenting your own project with photos at each stage provides valuable reference for future work and helps track progress.
Common Mistakes to Avoid and Maintenance FAQs
- Skipping proper surface cleaning and leveling leads to poor adhesion and uneven finished surfaces.
- Selecting interior-grade adhesives or tiles results in rapid deterioration when exposed to outdoor elements.
- Omitting expansion joints causes tiles to crack or pop during temperature changes.
- Applying grout too soon before adhesive cures weakens the entire installation.
- Neglecting annual sealing allows moisture to penetrate and cause long-term damage.
FAQs
How do I maintain mosaic tiles long-term? Sweep or hose off debris regularly and reapply sealer every twelve to eighteen months depending on exposure levels. Inspect joints for wear and touch up as needed.
What if tiles start lifting after installation? Remove loose tiles carefully, clean the substrate thoroughly, and reset with fresh thinset followed by proper curing time before regrouting.
Are mosaic projects suitable for high-traffic areas? Yes, when using durable exterior-rated materials and ensuring solid base preparation, mosaics perform well on pathways and patios with consistent maintenance.
Can I incorporate recycled materials into my design? Absolutely. Broken plates, glass bottles, or reclaimed tiles add character while supporting sustainable practices, provided they are properly prepared and sealed.
How long does a typical project take? Smaller patios or walls often require one to two weekends including preparation and finishing, while larger pathways may span several weeks depending on weather and daily work time available.
For additional guidance on home improvement techniques and outdoor upgrades, explore resources at HGTV, This Old House, and Family Handyman.

No comments yet. Be the first!