 Fixated on Home
Introduction to Solar DIY for Outdoor Renovations
Fixer-uppers in 2026 are increasingly turning to solar technology to enhance outdoor spaces sustainably. Integrating affordable solar features reduces reliance on grid power while adding value and charm to properties. This guide focuses on practical, beginner-friendly projects that align with broader outdoor renovation goals like improving landscaping and functionality without major structural changes. Solar outdoor builds emphasize energy savings through renewable sources. Homeowners can achieve noticeable reductions in utility bills by powering fountains, lighting, and charging stations independently. Real-world applications show these upgrades support eco-conscious living and increase property appeal. By focusing on modular, easy-to-install components, even those new to DIY can complete meaningful improvements that contribute to long-term sustainability.
Planning Your Outdoor Solar Project
Before starting any build, evaluate your yard's sunlight patterns using a free compass or sun-tracking app over several days. Identify south-facing areas for optimal panel performance and note potential obstructions like trees or fences. Measure available space and consider how each feature will integrate with existing patios, gardens, or decks. Create a simple sketch mapping panel locations to device placements to minimize wiring runs. This planning phase prevents common issues like insufficient power or awkward cable routing and ensures projects complement your overall renovation timeline.
Key Project Ideas for Solar Integration
Five accessible projects stand out for 2026 fixer-uppers. Each uses simple components and ties into existing outdoor elements such as patios or gardens.
1. Solar-Powered Water Fountains
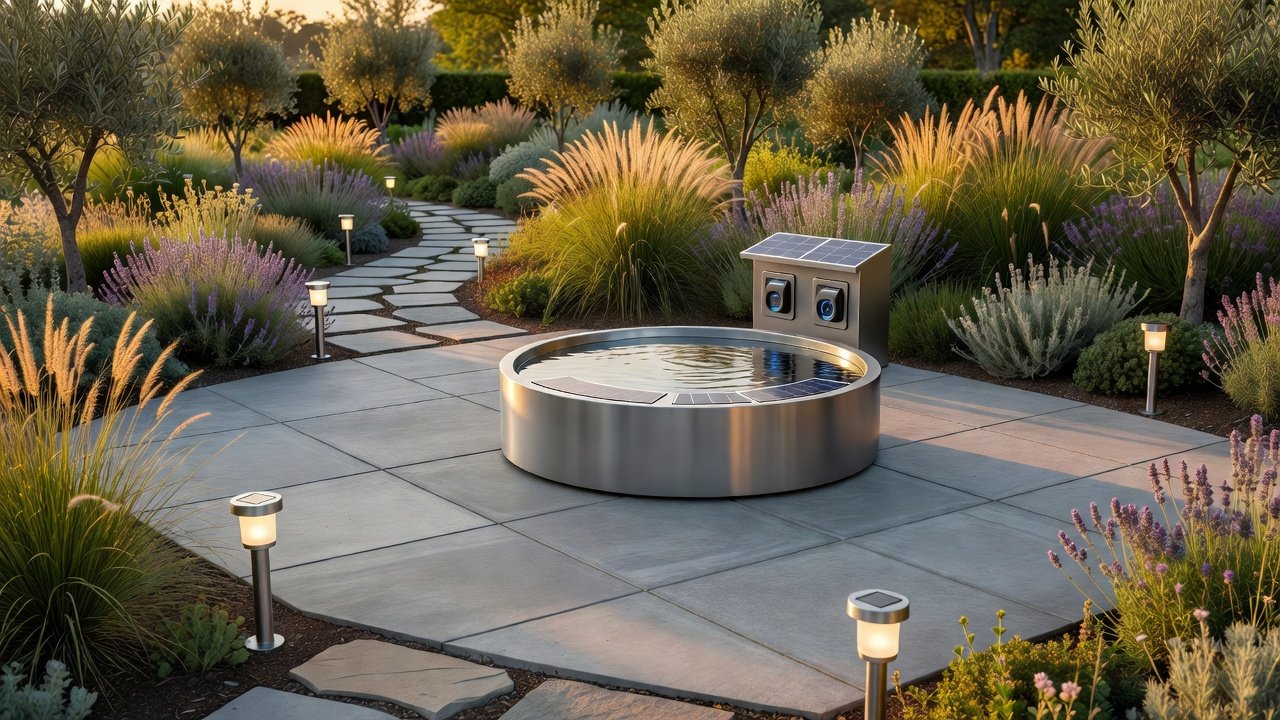
Enhance garden ambiance with a recirculating fountain. Materials typically include a small solar panel, submersible pump, tubing, basin, and optional decorative rocks. Installation starts by positioning the panel in direct sunlight, connecting the pump via waterproof connectors, and testing water flow before sealing joints. Variations include adding LED accents for evening displays or using larger basins for bigger visual impact.
2. Solar Pathway and Accent Lights
Illuminate walkways safely using stake lights or string options. These require LED fixtures, integrated panels, and basic mounting hardware. Steps involve selecting locations with good sun exposure, driving stakes firmly into soil, and adjusting angles for maximum light spread. Add motion sensors for security-focused setups.
3. Solar USB Charging Stations
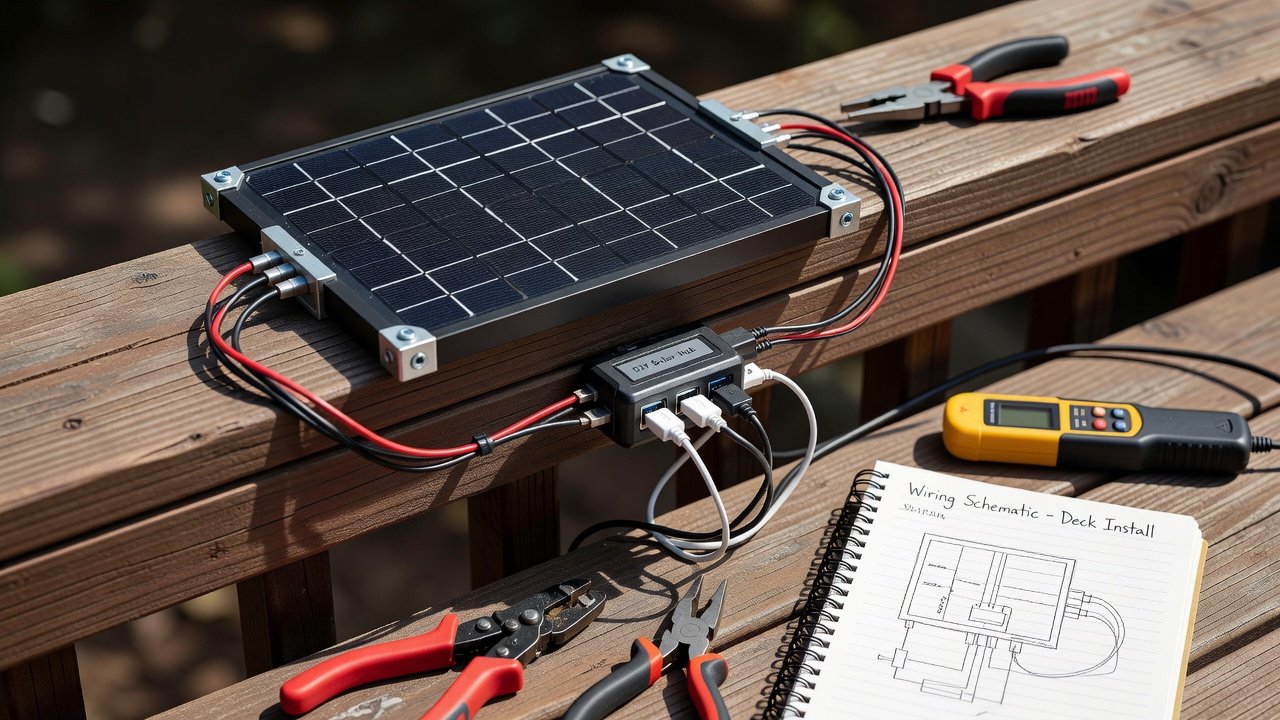
Create convenient outdoor power points for devices. Combine a portable panel with battery storage and weatherproof outlets. Assembly focuses on mounting the panel on a deck rail, routing cables through protective conduits, and wiring to a protected hub with multiple ports. Include surge protection for sensitive electronics.
4. Solar Bird Baths with Pumps
Support wildlife while adding visual interest. Use a solar aerator pump in an existing or new basin. Placement prioritizes stable surfaces and consistent sunlight. Add filtration elements to keep water clean longer and attract more birds.
5. Solar Security Spotlights
Boost safety around property perimeters. Motion-activated models with panels offer easy setup via wall mounts or ground stakes. Position lights to cover entry points and adjust sensitivity to avoid false triggers from wildlife.
Material Sourcing and Preparation
Project kits remain affordable, focusing on quality components that last. Compare options from reputable suppliers for panels rated for outdoor durability. Always verify compatibility with local weather conditions. Gather basic tools like screwdrivers, wire strippers, and levels ahead of time. Source weatherproof enclosures for batteries and controllers to extend system life.
Detailed Step-by-Step Installation Instructions
Begin each build by assessing sun exposure using a simple compass app. Assemble components on a flat surface first to verify fit. For wiring, use waterproof connectors and route cables underground in conduit or along structures with clips. Secure panels with brackets rated for wind loads in your area. Test functionality during daylight before final securing. Allow 2-4 hours per project for beginners, and work in pairs for heavier items like basins. After setup, monitor output for the first week to fine-tune positioning.
Safety Tips for Wiring and Setup
Always disconnect power sources during assembly. Use insulated tools and avoid working in wet conditions. Ground panels properly to prevent shorts, and consult local codes for any buried lines. Wear protective gear when handling sharp edges or heavy basins. Never exceed the amperage rating of your wiring, and label all connections clearly. If extending cables, use outdoor-rated extensions only to maintain safety and performance.
Comparing Solar Panel Types for Durability
Monocrystalline panels offer higher efficiency and longevity in varied climates, performing well even on partly cloudy days. Polycrystalline alternatives provide solid performance at lower costs for milder areas with consistent sun. Thin-film options suit flexible installations but may require more surface area and frequent cleaning. Evaluate based on warranty length, temperature tolerance, and expected lifespan for 2026 projects. Consider hybrid systems that combine types for specific feature needs.
Real Examples from 2026 Case Studies
Homeowners in suburban areas reported successful integrations, such as a fountain setup that operated reliably through summer months with minimal intervention. Another case involved pathway lights reducing evening energy use significantly while enhancing curb appeal. A third example featured a charging station installed on a renovated deck that powered multiple devices during weekend gatherings, demonstrating versatility in daily use.
Cost Breakdowns Versus Traditional Power
Solar options deliver long-term savings by eliminating ongoing electricity expenses for outdoor features. Initial investments recover through reduced bills and minimal maintenance over several seasons. Traditional wired alternatives often incur higher installation fees and recurring costs. Explore resources at energy.gov for broader solar adoption data and nrel.gov for efficiency comparisons.
Maintenance and Troubleshooting
Clean panel surfaces monthly with water and a soft cloth to remove dust or pollen. Inspect connections seasonally for corrosion and tighten as needed. Common issues include reduced flow from clogged pumps or dim lights from shading; resolve by repositioning panels or clearing debris. Store removable components indoors during harsh winters if recommended by manufacturers.
FAQ on Permits and Maintenance
- Do I need permits? Small-scale DIY solar typically does not require permits, but check municipal rules for larger arrays or electrical ties.
- How often should I maintain panels? Clean surfaces monthly with water and inspect connections seasonally for optimal output.
- What about winter performance? Panels work in cold weather; angle them to shed snow for optimal output and consider tilt adjustments.
- Can I expand the system later? Yes, most setups allow adding panels or batteries as needs grow, provided controllers support extra capacity.
- Are there rebates available? Check local utility programs or federal incentives through official energy sites for potential support on solar additions.
Additional guidance is available through epa.gov on sustainable home practices.
Conclusion
These solar builds empower fixer-uppers to create functional, energy-efficient outdoor spaces. Starting small builds confidence and delivers immediate benefits in sustainability and enjoyment while supporting broader renovation objectives.
No comments yet. Be the first!