 Fixated on Home
Introduction
Homeowners tackling fixer-uppers often prioritize indoor renovations, but outdoor safety upgrades are equally critical for creating secure living spaces. These projects enhance curb appeal, prevent accidents, and add lasting value to older properties that may have outdated features. With changing weather patterns in 2026, including more extreme rainfall, temperature swings, and wind events, prioritizing durable outdoor improvements makes sense. This guide details five high-impact DIY upgrades tailored for 2026 conditions: non-slip deck treatments, sturdy railings, motion-activated lighting, child and pet barriers, and secure storage solutions. Each section includes detailed step-by-step instructions, material comparisons for long-term durability in various climates, real-world examples from typical suburban homes, and guidance on staying within budget-friendly parameters. By focusing on these upgrades, you can reduce liability risks while boosting overall property appeal and functionality.
1. Non-Slip Deck Treatments
Slippery decks pose significant risks in wet or icy 2026 weather patterns, especially on fixer-uppers where surfaces may have worn over time. Applying a non-slip treatment improves traction without requiring full reconstruction, making it an accessible starting point for many homeowners. Consider a typical two-story home in a coastal area where salt air accelerates wear; adding this treatment can prevent falls during morning dew or sudden storms.
Step-by-Step Instructions
- Inspect the deck for loose boards or rot and repair any damage first using basic carpentry tools like a hammer and screws.
- Clean the deck thoroughly with a pressure washer on a low setting to remove dirt, mildew, and old finishes without damaging the wood.
- Apply a suitable primer designed for exterior use, allowing it to dry completely according to product guidelines.
- Roll or spray the non-slip coating evenly across the surface, working in sections to maintain consistency.
- Allow full curing time, typically 24 to 48 hours, before heavy foot traffic resumes.
Material comparisons show that rubberized coatings perform well in freeze-thaw cycles common in northern climates, resisting cracking better than standard paints. Textured acrylic paints suit milder southern regions where UV exposure is higher. Both outperform bare or stained wood in longevity when applied correctly. Real-world examples include homeowners in the Pacific Northwest who reported fewer slips after using composite-infused treatments on aging cedar decks. Always wear protective gear such as gloves and goggles during application.
2. Sturdy Railings
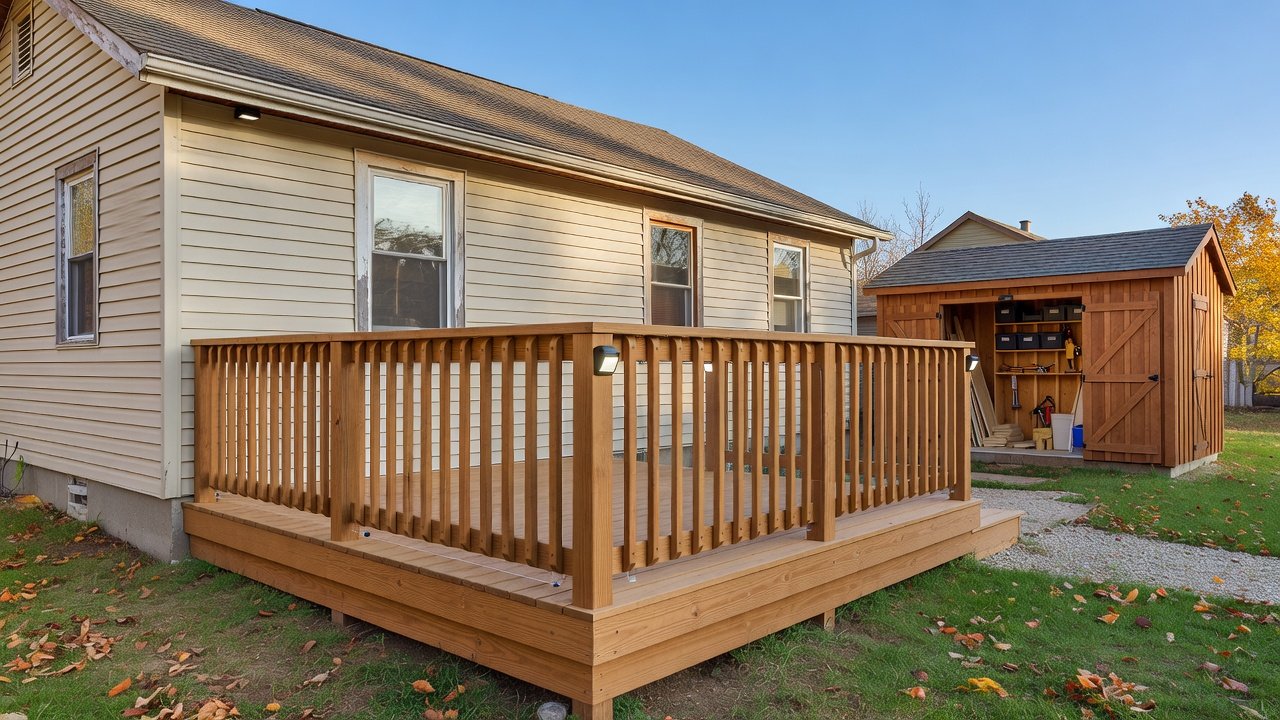
Secure railings prevent falls from decks, porches, and stairs on properties that may have been built before modern standards. Focus on code-compliant heights and spacing to ensure safety without professional installation. In regions experiencing increased wind in 2026, reinforced designs help structures withstand gusts.
Step-by-Step Instructions
- Measure and mark post locations every six feet along the deck perimeter using a tape measure and level for accuracy.
- Install pressure-treated posts set into concrete footings at least 24 inches deep to provide solid anchorage.
- Attach top and bottom rails securely with galvanized brackets, then add balusters spaced no more than four inches apart.
- Sand all surfaces smooth and apply a weather-resistant sealant or paint for protection against moisture.
- Test stability by applying gentle pressure to each section before final use.
Compare aluminum railings for superior corrosion resistance in humid or salty environments versus traditional wood for a classic look that blends with older homes. Real-world cases show families in Midwest fixer-uppers adding composite railings to match existing fencing while improving safety around play areas. Include handrails on stairs for complete coverage.
3. Motion-Activated Lighting
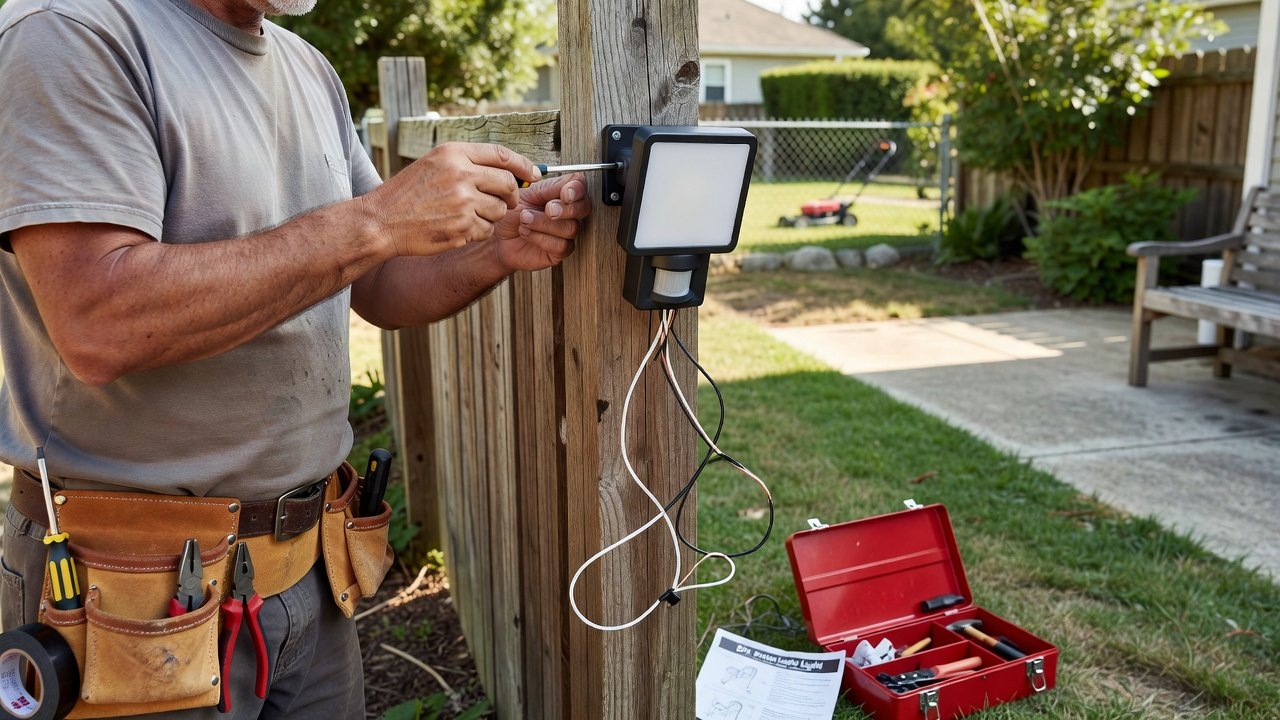
Well-lit exteriors deter intruders and reduce trip hazards during nighttime hours, an essential upgrade for properties with dark corners or long driveways. Solar-powered options work well for areas without easy wiring access.
Step-by-Step Instructions
- Choose LED fixtures rated for outdoor use with adjustable sensitivity and timer settings to match your property layout.
- Wire to existing circuits if possible or opt for wireless solar models that charge during daylight hours.
- Mount sensors at chest height on walls or posts, angling them to cover walkways and entry points effectively.
- Test the detection range by walking through the area at various speeds and adjust the settings accordingly.
- Secure all connections with weatherproof covers to prevent water damage over time.
LED models with adjustable timers offer the best energy efficiency for varying seasonal daylight lengths across different U.S. zones. Homeowners in rural fixer-uppers have shared examples of reduced wildlife encounters and improved evening safety after installation.
4. Child and Pet Barriers
Barriers around pools, gardens, or steep drop-offs protect young family members and pets from hazards common on older properties. These additions create defined safe zones while maintaining yard accessibility.
Step-by-Step Instructions
- Assess high-risk zones by walking the property and noting areas near water features, slopes, or busy roads.
- Install fencing or gates with self-closing and self-latching mechanisms to meet basic safety expectations.
- Use weather-resistant mesh, vinyl, or picket materials that blend with the landscape without obstructing views.
- Secure everything with ground anchors or concrete bases for stability against wind or playful activity.
- Ensure gates swing freely and test latches regularly during the first few weeks.
Plastic composites resist warping and fading better than wood in extreme 2026 heat and rain cycles. Examples from suburban homes demonstrate how simple mesh barriers around vegetable gardens keep pets safe while allowing easy access for owners.
5. Secure Storage Solutions
Lockable sheds or cabinets keep tools, fertilizers, and chemicals out of reach while organizing cluttered yards on fixer-uppers. Proper placement avoids blocking emergency access routes.
Step-by-Step Instructions
- Select a level site away from the main house and any utilities, ensuring good drainage underneath.
- Assemble a weatherproof unit with reinforced doors and hinges using included hardware and basic power tools.
- Add heavy-duty padlocks along with ventilation features to reduce moisture buildup inside.
- Anchor the entire structure to concrete pads or heavy ground stakes for added security against storms.
- Organize contents with shelves and label bins for quick identification during routine use.
Metal units provide superior durability compared to resin in high-wind areas, while both resist pests better than open shelving. Real-world applications include urban backyard renovations where compact cabinets freed up space and improved safety.
Local Building Codes and Compliance
Always verify requirements with your local municipality before beginning any project. Railings must typically meet specific height and baluster spacing rules, while lighting and barriers may have fewer restrictions. Check resources from iccsafe.org for model building codes and osha.gov for general safety standards. Permits are often needed for structural changes like railings or fencing over certain heights. Consulting these guidelines early avoids costly rework and ensures long-term compliance with evolving 2026 regulations.
Common Mistakes to Avoid
- Skipping surface preparation, which leads to poor adhesion and premature failure of coatings or sealants.
- Using indoor-rated materials outdoors, resulting in rapid deterioration from UV and moisture exposure.
- Ignoring proper drainage around new installations, causing water pooling and structural issues over time.
- Overlooking seasonal expansion and contraction in wood components, leading to loose fittings.
- Failing to test finished work thoroughly, missing small defects that could compromise safety.
FAQ
Do these projects require permits?
Many safety upgrades like lighting or non-slip coatings do not require permits, but structural additions such as railings or barriers often do. Always confirm with local authorities to avoid violations.
How often should maintenance occur?
Inspect railings and barriers quarterly for loose parts, clean lighting sensors monthly to maintain responsiveness, and reapply protective coatings annually for optimal performance in changing weather.
Can these upgrades increase property value?
Yes, visible safety improvements often appeal to buyers seeking move-in-ready homes, particularly when documented with before-and-after photos and material receipts.
Conclusion
Implementing these five DIY outdoor safety upgrades transforms fixer-uppers into secure, valuable homes ready for 2026 and beyond. Prioritize quality materials suited to your specific climate and follow code guidelines for the best long-term results. Start with one project this season to build momentum, enjoy immediate peace of mind, and continue enhancing your property step by step.
No comments yet. Be the first!