 Fixated on Home
Introduction
Modern renovations present a unique window to weave advanced smart home technology into your living spaces without sacrificing clean architectural lines or open-concept flow. When homeowners plan upgrades across distinct construction phases such as demolition, rough-in wiring, mechanical installation, and final finishing, they gain the ability to create responsive environments for lighting, climate control, security, and real-time energy monitoring. The result is a residence that feels both technologically sophisticated and visually elevated.
This comprehensive guide walks through every critical consideration, from initial legacy system audits to device selection criteria, wired versus wireless trade-offs, and phased budgeting strategies. Detailed examples from actual open-concept projects demonstrate how to maintain design integrity while achieving long-term functionality. By following these steps, you can avoid common pitfalls that lead to visible clutter or costly rework.
Evaluating Legacy Systems Before Renovation Begins
Thorough assessment of existing electrical panels, HVAC zoning, lighting circuits, and network infrastructure forms the foundation of any successful integration. Begin by creating a detailed floor plan that marks every outlet, switch, and fixture. Note amperage ratings, wire gauge, and whether circuits are grounded. Older homes frequently contain aluminum wiring or undersized panels that cannot support additional smart loads without upgrades.
Engage a licensed electrician early to perform a load calculation and infrared scan for hot spots. Simultaneously evaluate internet connectivity by testing signal strength in every room. This evaluation phase typically reveals whether you need a new subpanel, structured cabling runs, or dedicated circuits for high-draw devices such as EV chargers and whole-home battery systems. Documenting these findings prevents mid-renovation surprises and supports accurate contractor bids.
Strategic Timing Across Renovation Phases
Successful smart home installations depend on precise coordination with the construction schedule. During demolition, remove obsolete switches, thermostats, and sensors while walls are open. This is also the moment to identify chase routes for future cabling. In the rough-in phase, electricians and low-voltage technicians install conduit, Cat6 or fiber backbone, structured media enclosures, and power feeds for future hubs or PoE devices.
Mechanical and insulation stages provide opportunities to embed sensors within ductwork or under flooring for radiant heating. Once drywall is hung, focus shifts to device mounting, touchscreen placement, and software commissioning. Final walkthroughs include user training and scene programming so the system operates intuitively from day one. Aligning technology milestones with each trade’s presence minimizes delays and protects finished surfaces.
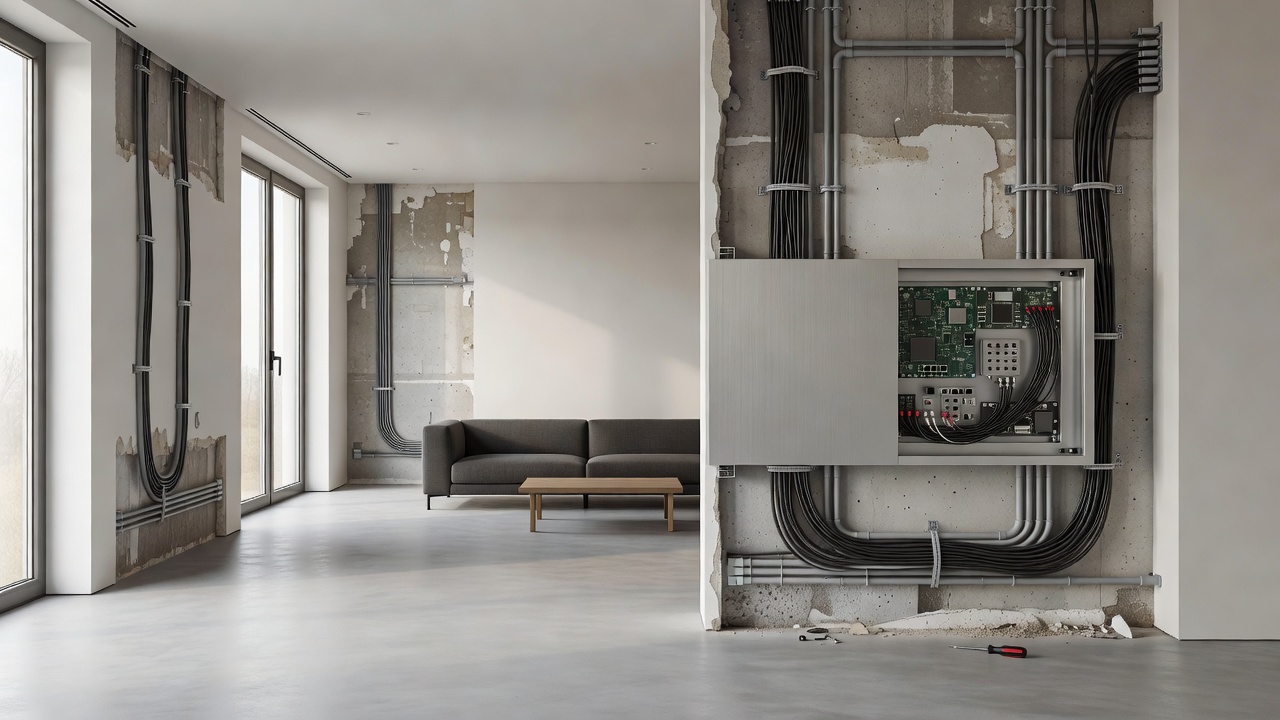
Hidden Infrastructure for Seamless Aesthetics
Modern design demands that technology remain invisible. Run low-voltage wiring through walls and ceilings using flexible conduit so future devices can be added without surface disruption. Place central hubs and network switches inside closets or dedicated utility rooms with proper ventilation. Recessed enclosures for keypads and touchscreens allow flush mounting that matches surrounding millwork.
Wireless access points should be positioned centrally and painted to match ceilings. Motorized shade motors can be concealed within valances, while door and window sensors fit into frames during trim installation. These techniques preserve minimalist interiors while delivering whole-home coverage that feels effortless.
Selecting Compatible Devices for Energy Monitoring and Automation
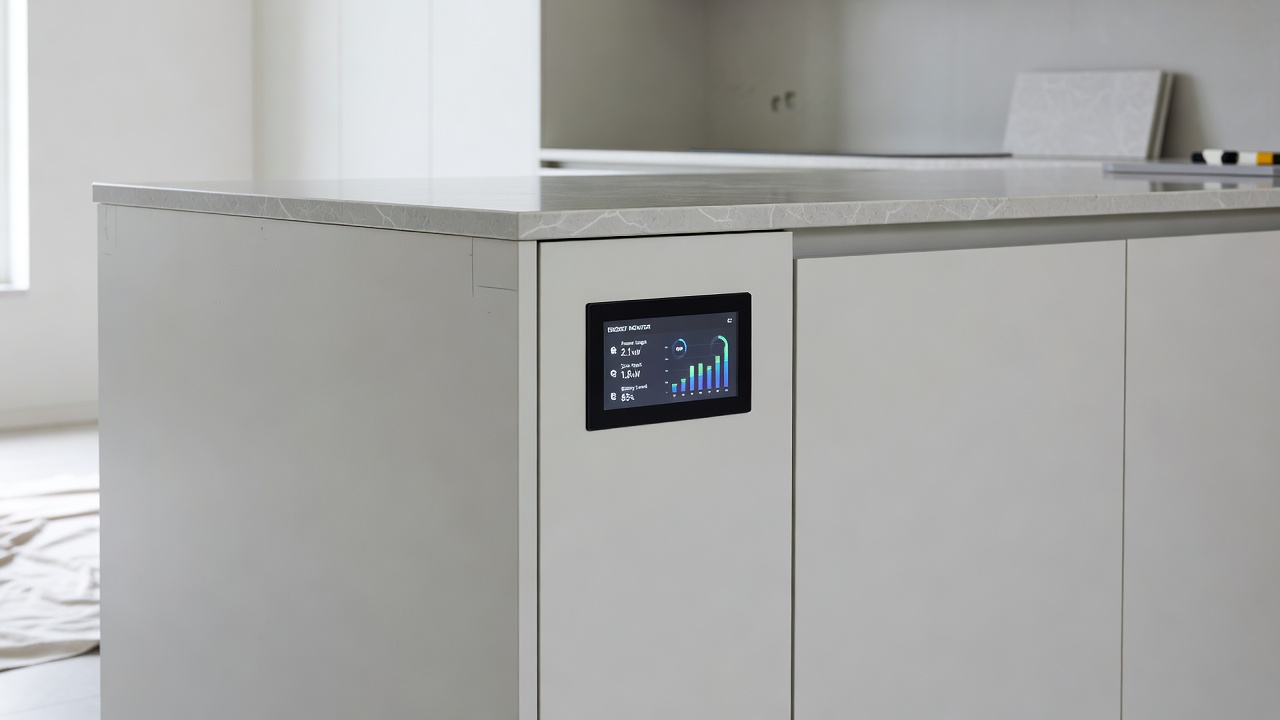
Device compatibility is essential for long-term reliability. Prioritize products supporting the Matter standard or established protocols such as Zigbee 3.0 and Z-Wave Plus. Energy-monitoring smart plugs and circuit-level sensors provide granular data that helps optimize consumption across open living areas. Choose thermostats with multi-room averaging and occupancy detection to maintain comfort without constant manual adjustment.
For lighting, select tunable LED fixtures and dimmers that integrate with both wall controls and voice assistants. Motorized shades, smart locks, and security cameras should share the same ecosystem to enable unified scenes. Always verify UL or ETL listings and review firmware update policies before purchase. Real-world installations often combine a primary hub with battery backup and secondary mesh nodes for redundancy in larger homes.
Wired Versus Wireless Options: A Detailed Comparison
- Wired backbone systems deliver near-instant response times and are immune to interference, making them ideal for lighting zones, whole-home audio, and security cameras. Installation requires access during framing but yields lower long-term maintenance.
- Wireless mesh networks excel in flexibility, allowing sensors and portable devices to be relocated easily. Modern Wi-Fi 6E and 7 routers handle dozens of simultaneous connections, though thick walls or metal ductwork may necessitate additional nodes.
- Hybrid approaches combine a wired core for critical loads with wireless peripherals for convenience. This strategy balances performance, cost, and future expandability.
Evaluate signal mapping during the planning stage to decide which rooms benefit most from each method.
Budgeting Tech Alongside Construction
Integrate technology expenses into the overall renovation budget by allocating line items for each phase. Early phases cover conduit, cabling, and panels, while later phases fund individual devices and programming. Build in a contingency for professional commissioning and potential firmware or accessory additions as rooms are completed. Coordinate payment schedules with your general contractor so technology draws align with construction draws, preventing cash-flow gaps.
Consider lifecycle costs such as replacement batteries, cloud subscriptions, and eventual hardware refreshes. Many homeowners discover that investing in scalable infrastructure during renovation reduces total ownership expenses over a decade compared with piecemeal retrofits.
Real-World Examples of Phased Implementations
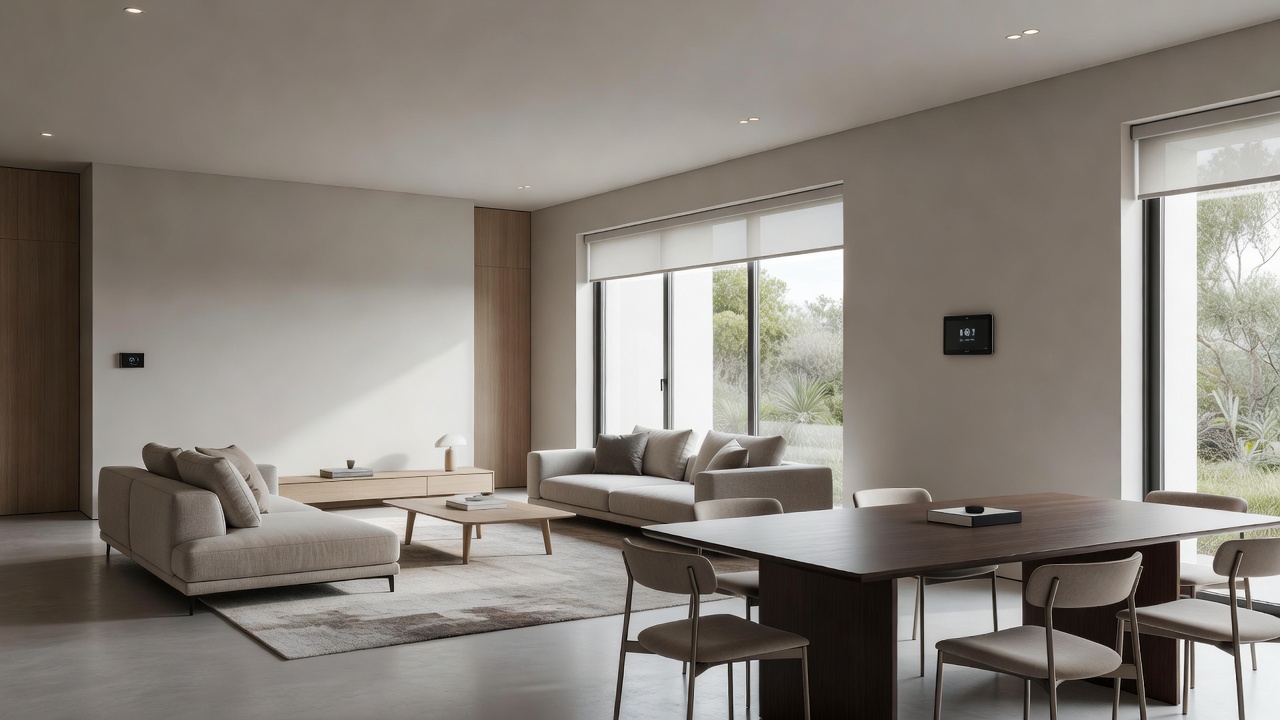
One urban loft project installed a wired lighting control backbone and structured cabling during the rough-in phase. After drywall, the owners added wireless occupancy sensors and a central energy dashboard. The finished space now automatically adjusts lighting and shades based on daylight levels while maintaining an uncluttered aesthetic across 1,800 square feet of open-plan living.
In a suburban two-story renovation, new HVAC zoning equipment and smart dampers were integrated during mechanical rough-in. Wireless room sensors and a learning thermostat were commissioned in the finishing stage. The system now creates independent comfort zones and has delivered measurable reductions in monthly energy use through automated scheduling and remote monitoring.
A third example involved a historic home conversion where concealed conduit runs protected original plasterwork. Battery-powered sensors and a mesh network were deployed after finishing, allowing full smart functionality without altering historic details.
FAQs: Addressing Common Compatibility Issues
How do I ensure new smart switches work with existing three-way wiring?
Confirm traveler wire presence and select switches specifically rated for multi-way configurations. Many kits include adapters that convert legacy wiring without requiring additional travelers.
What happens if my Wi-Fi network cannot support dozens of devices?
Upgrade to a tri-band mesh system and create a separate IoT SSID. Wired backhaul between nodes provides the stability needed for large device counts.
Can smart home systems be expanded after the renovation is complete?
Yes, provided spare conduit and a scalable hub were installed during construction. Most major ecosystems support seamless addition of new devices.
Are there special considerations for open-concept spaces with high ceilings?
Position sensors and access points at multiple heights and use directional antennas where needed. Ceiling-mounted devices often provide better coverage than wall-mounted alternatives in vaulted areas.
How do I maintain system security after installation?
Enable automatic firmware updates, use strong unique passwords, and segment the network so smart devices remain isolated from primary computers and media servers.
Conclusion
By treating smart home integration as a core element of phased renovation planning, homeowners achieve lasting functionality that complements modern design. Early evaluation, precise timing, concealed infrastructure, and careful device selection together create homes that are both beautiful and intelligently responsive. Begin the process with a thorough legacy audit and maintain close coordination with your renovation team to realize the full potential of a connected living environment.

No comments yet. Be the first!